
How to Change Your Muse Login Email (Including Devices and 2FA)
Muse's login email, contact info and security settings are managed by Meta Account. Changing the email, signing out old devices and turning on two-factor authentication all happen in the same account center inside Muse settings.
This guide uses the web interface. Menu names may differ slightly by region and version. Before you start, make sure you are signed in to the Muse account you want to manage, and that both the new email and the authenticator are under your own control.
Important: When changing the email, add and verify the new email first, then delete the old one. After enabling 2FA, save your recovery codes. Never enter passwords, recovery codes or authenticator keys into unfamiliar web pages.
1. Open Meta Account
Check your account quota
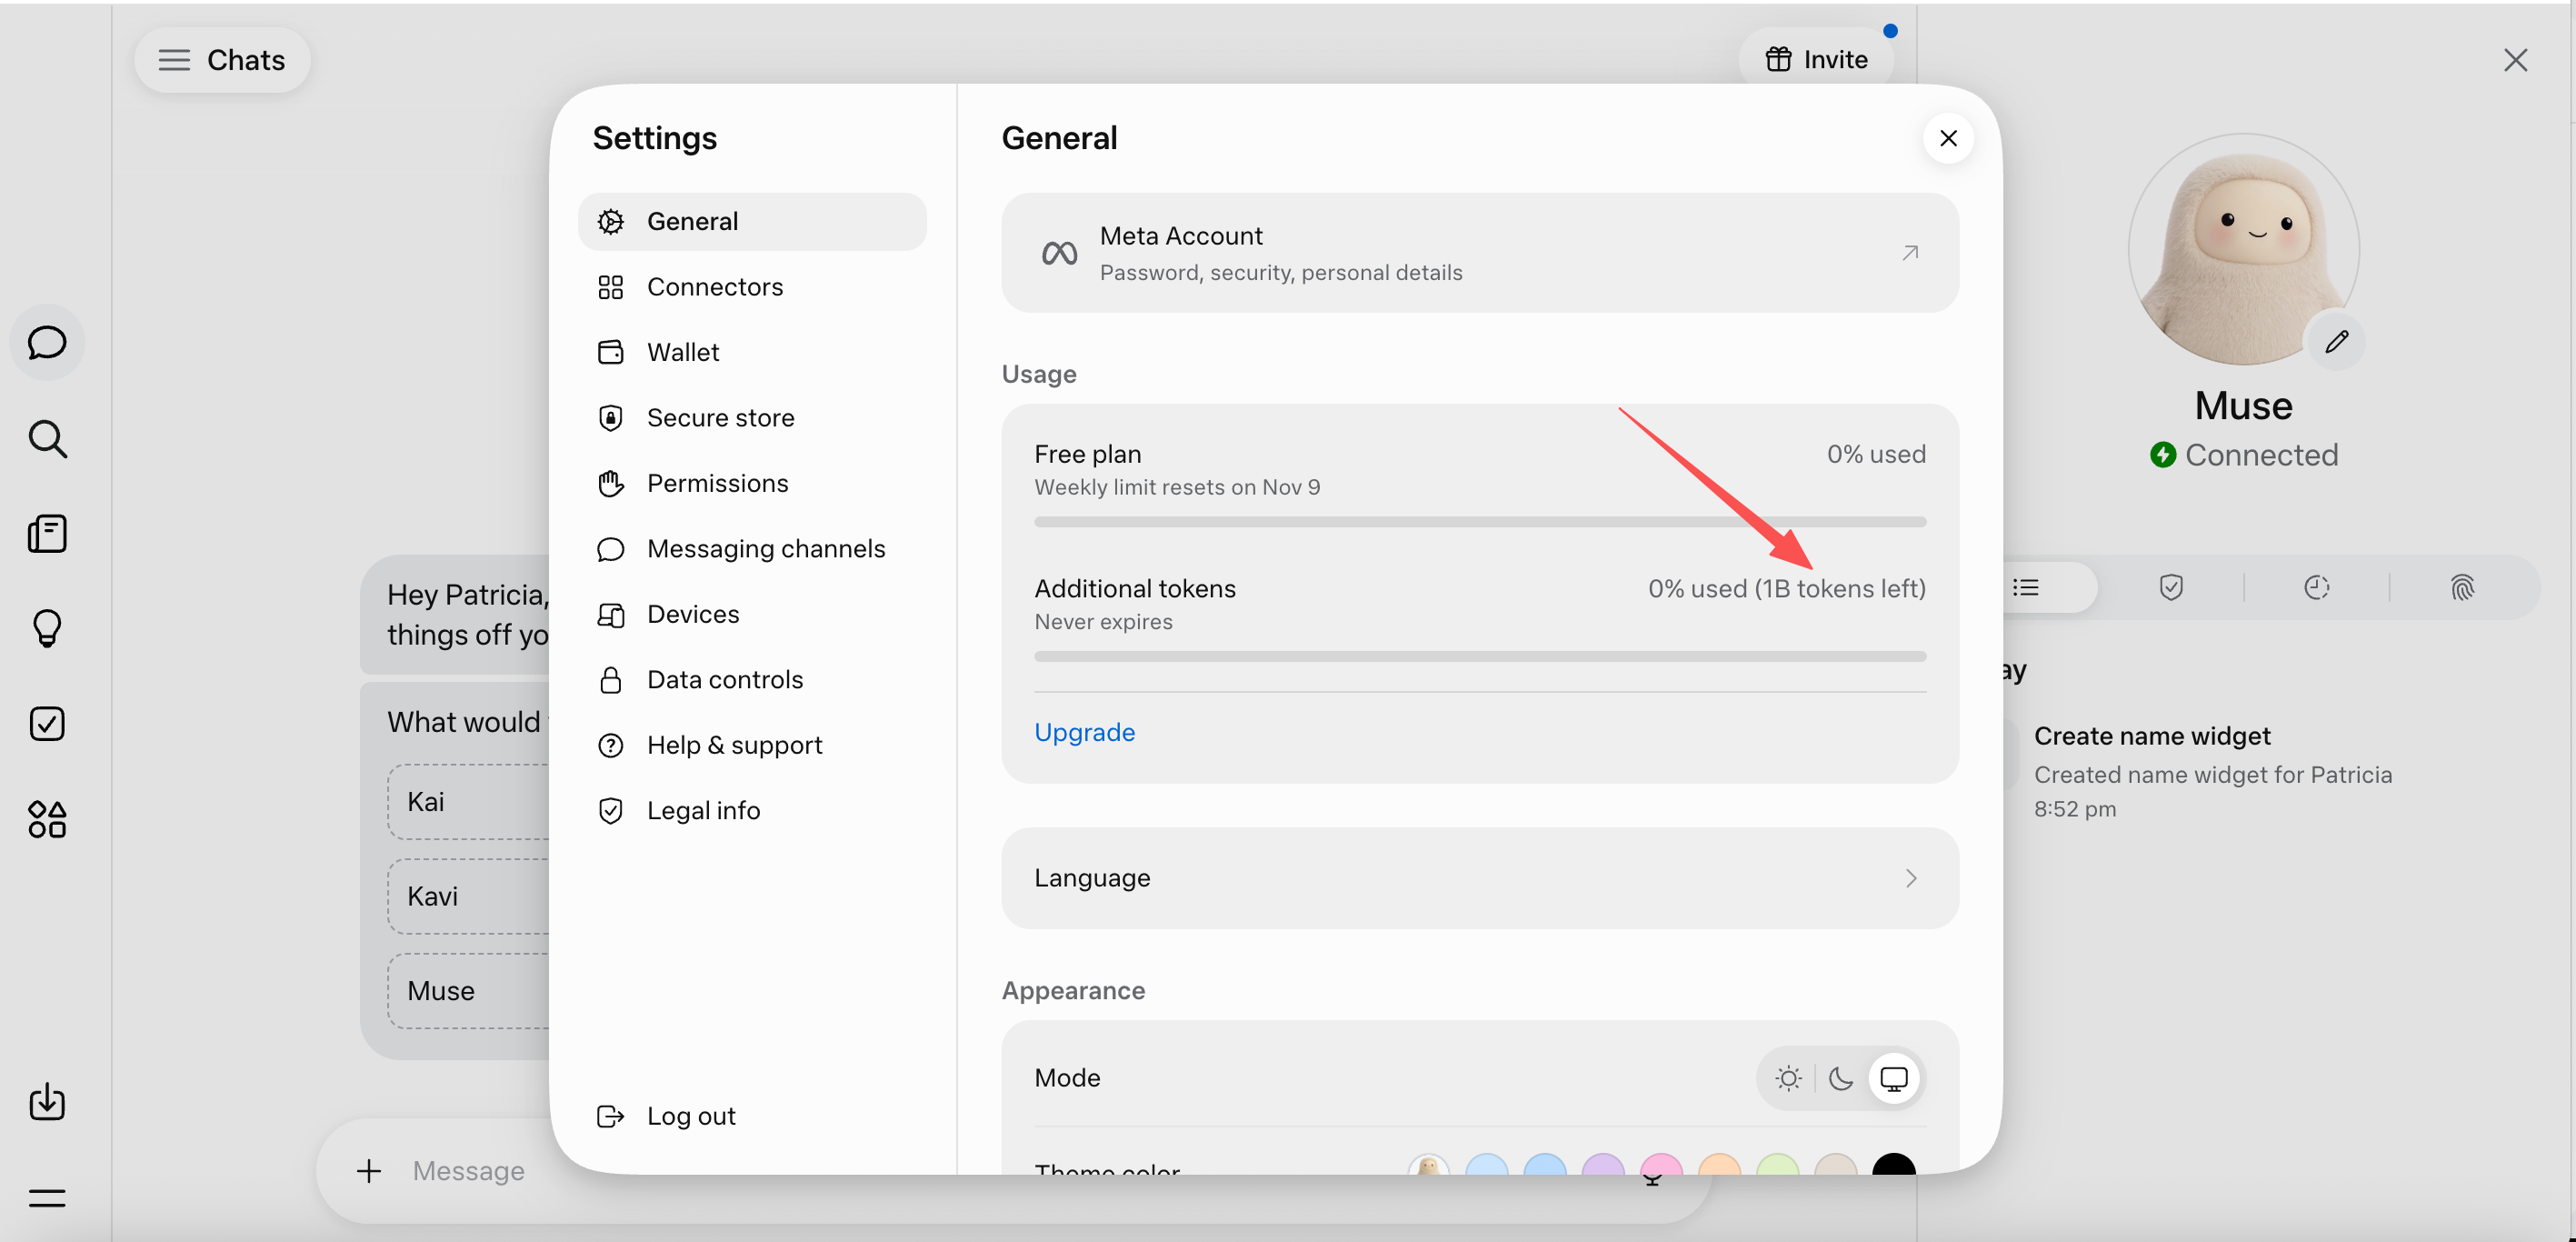
Open Settings at the bottom left of Muse and stay on the General page. The Usage section shows when the free plan resets and how many extra tokens the account already has; the arrow in the screenshot points to 1B tokens left.
Open the account center
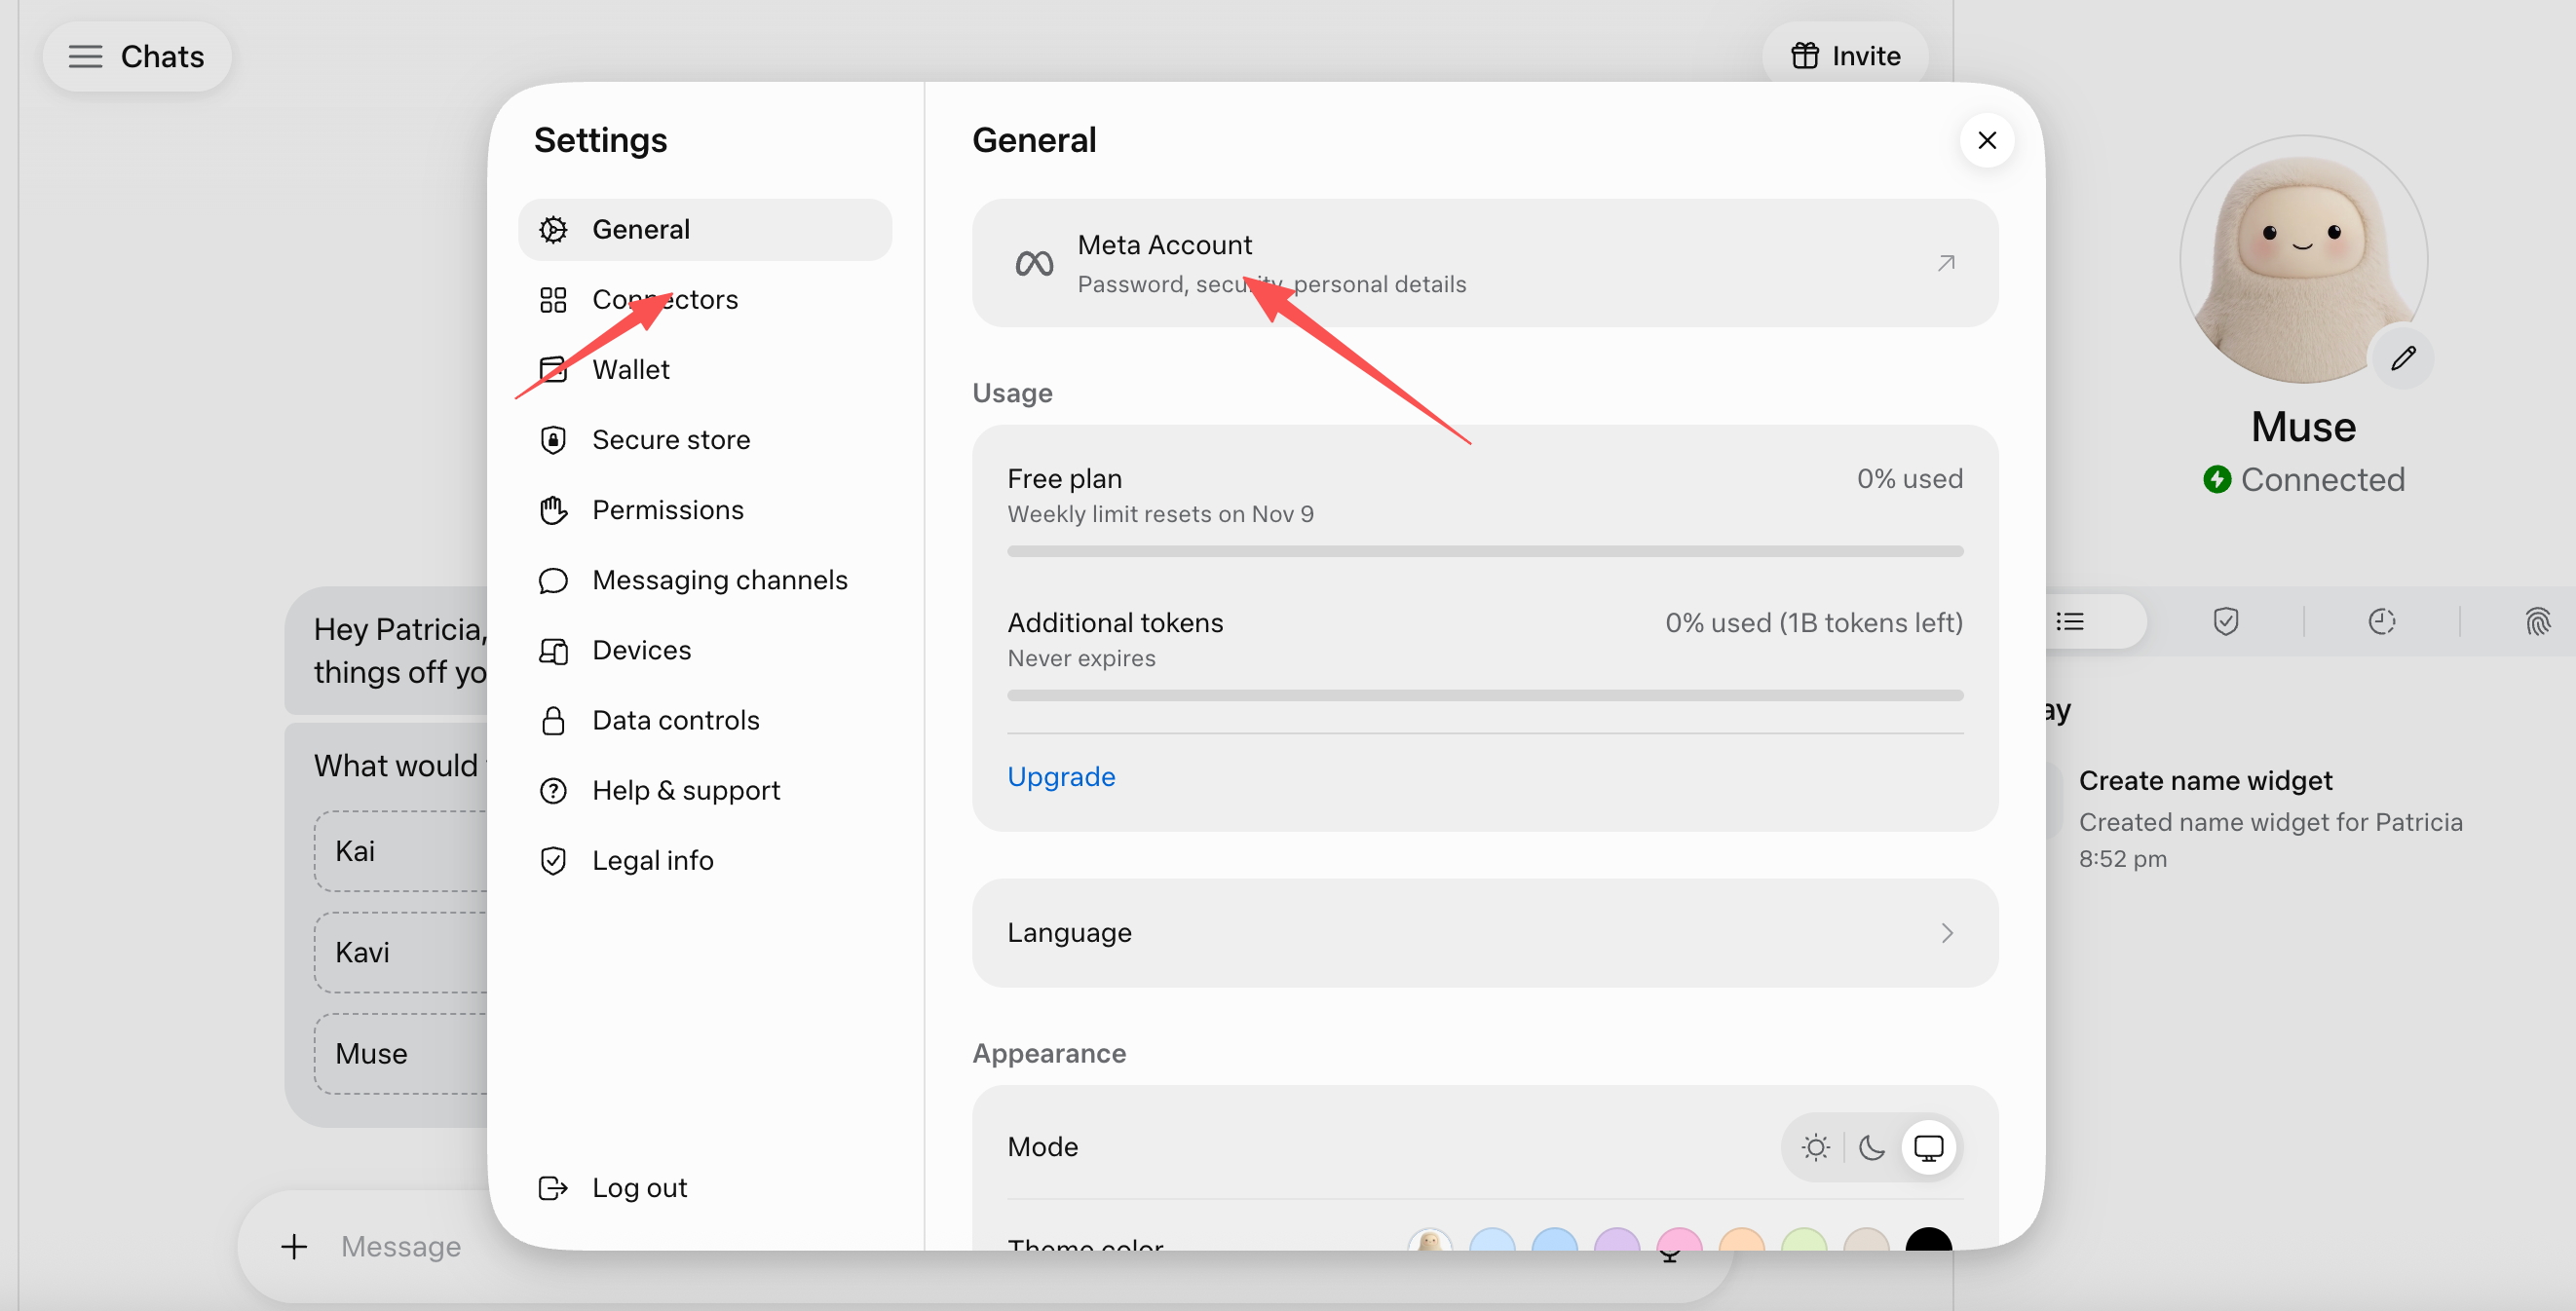
The Meta Account entry at the top of the same page manages the login email, devices and account security. Clicking it opens the account settings in a new window.
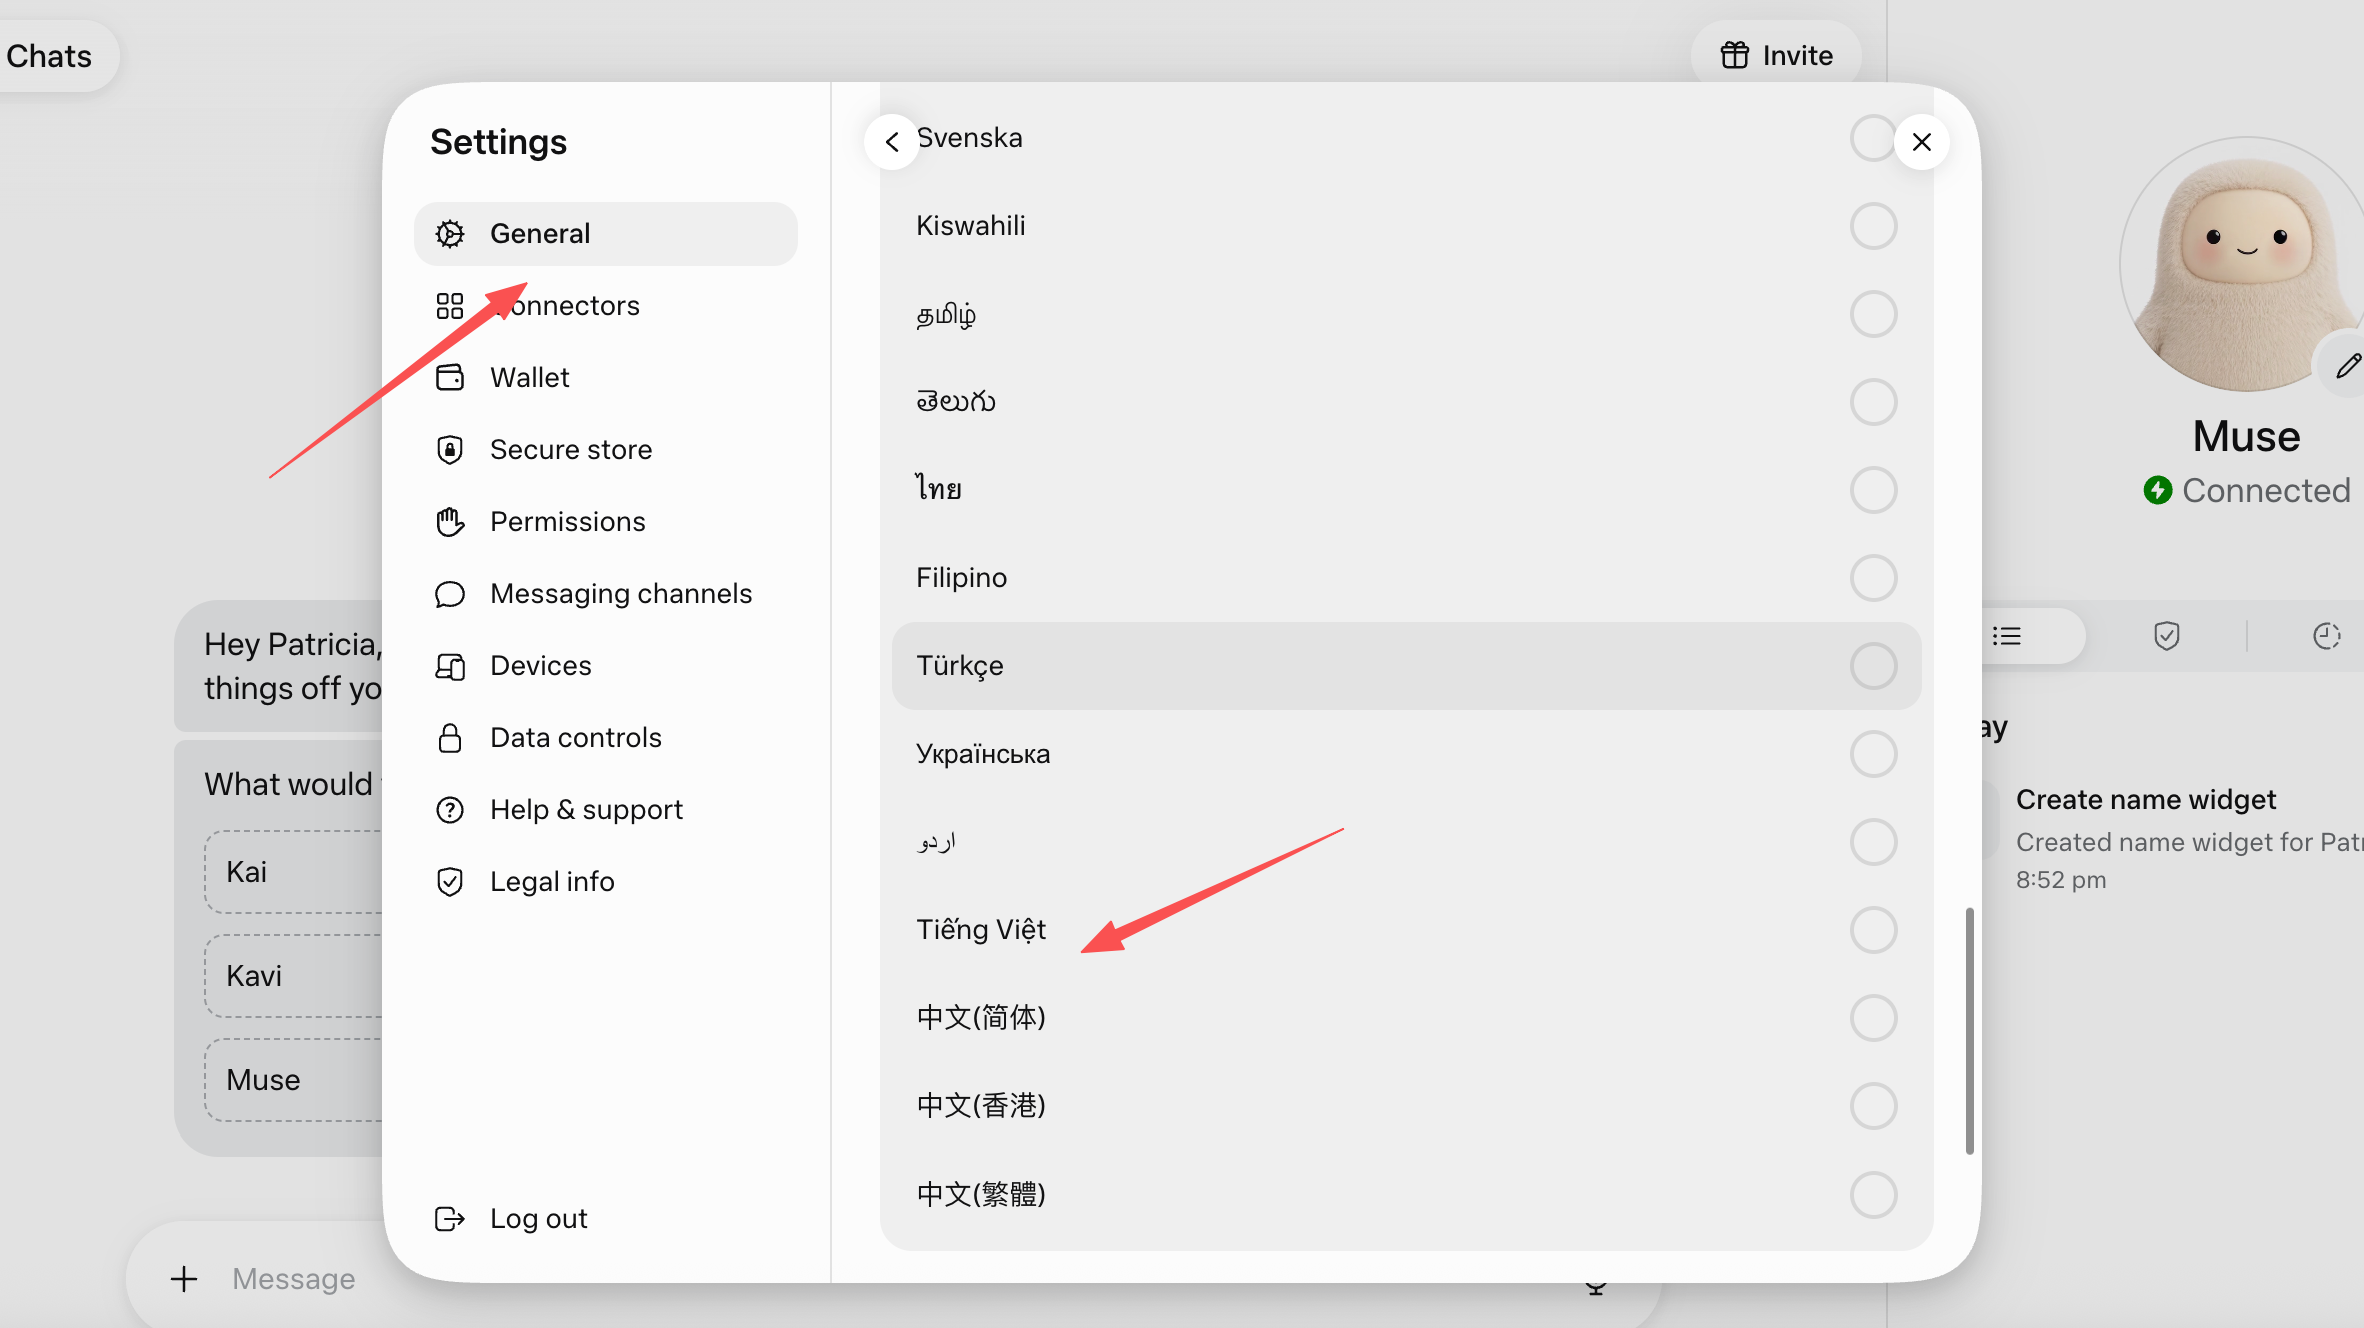
If the interface is in English, switch to Simplified Chinese under Language first so the menu names match this guide.
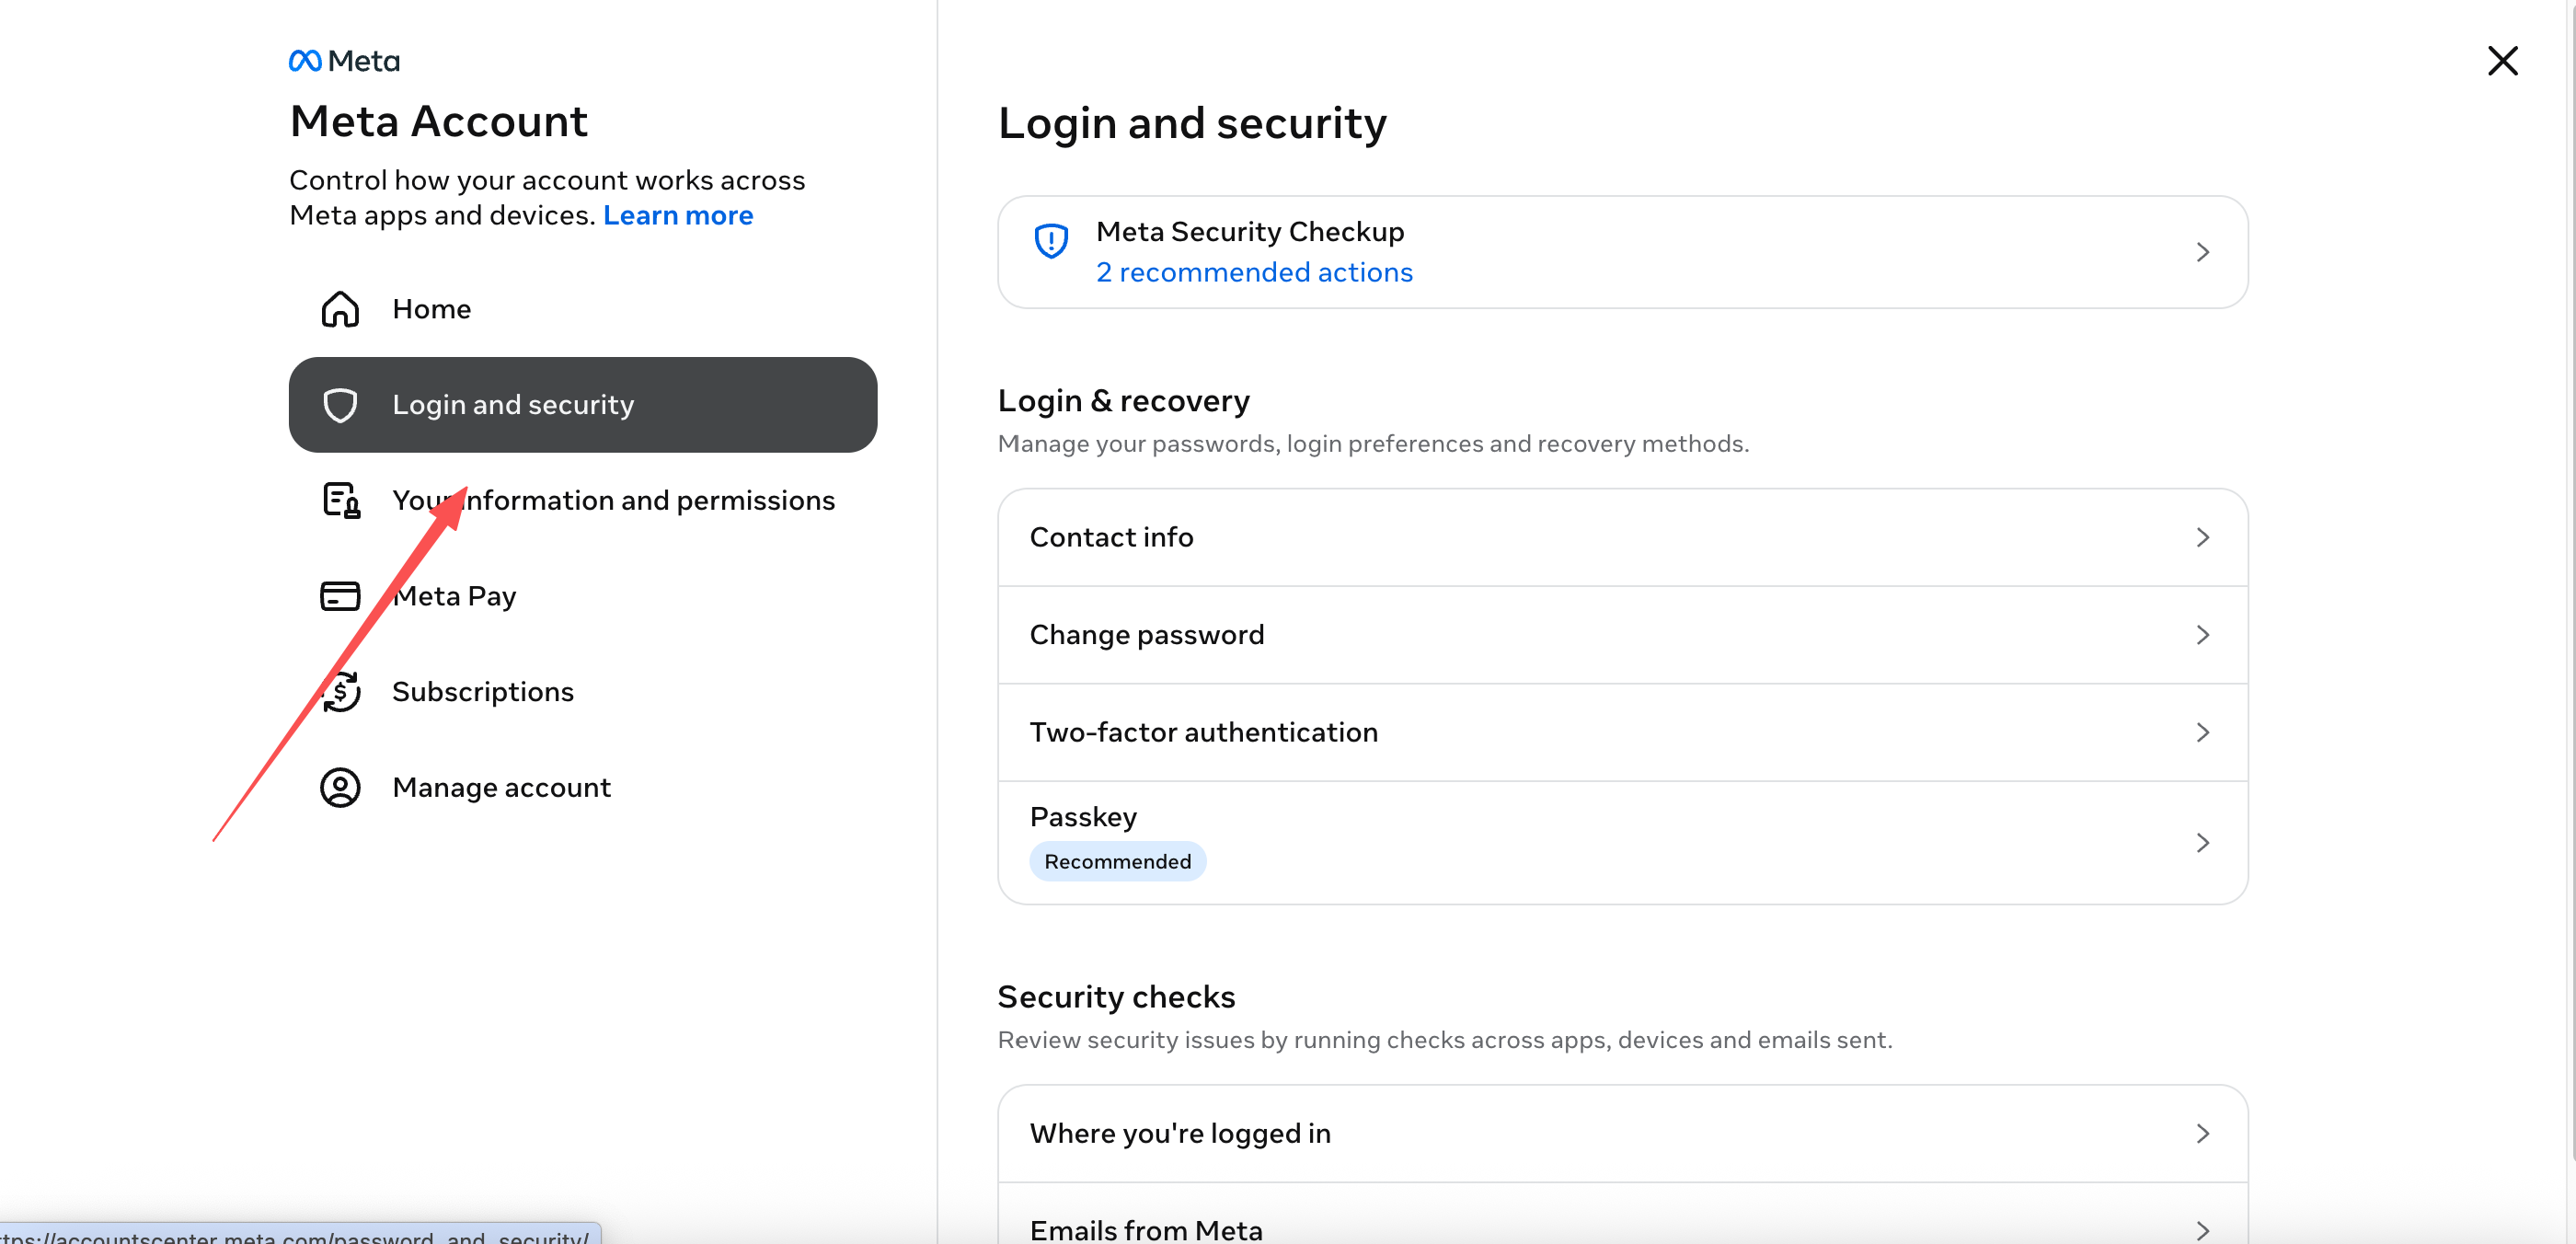
After it opens, select Login and security on the left. The email, signed-in devices and two-factor authentication are all managed here.
2. How to change the Muse login email
Meta Account supports adding a new contact first and removing the old email afterwards. Adding first and deleting later avoids missing confirmation emails after deletion, or being locked out once the old email stops working.
Step 1: Open contact info
In Login and security, click the current email in the account info.
On the Contact info page, click Add new contact info.
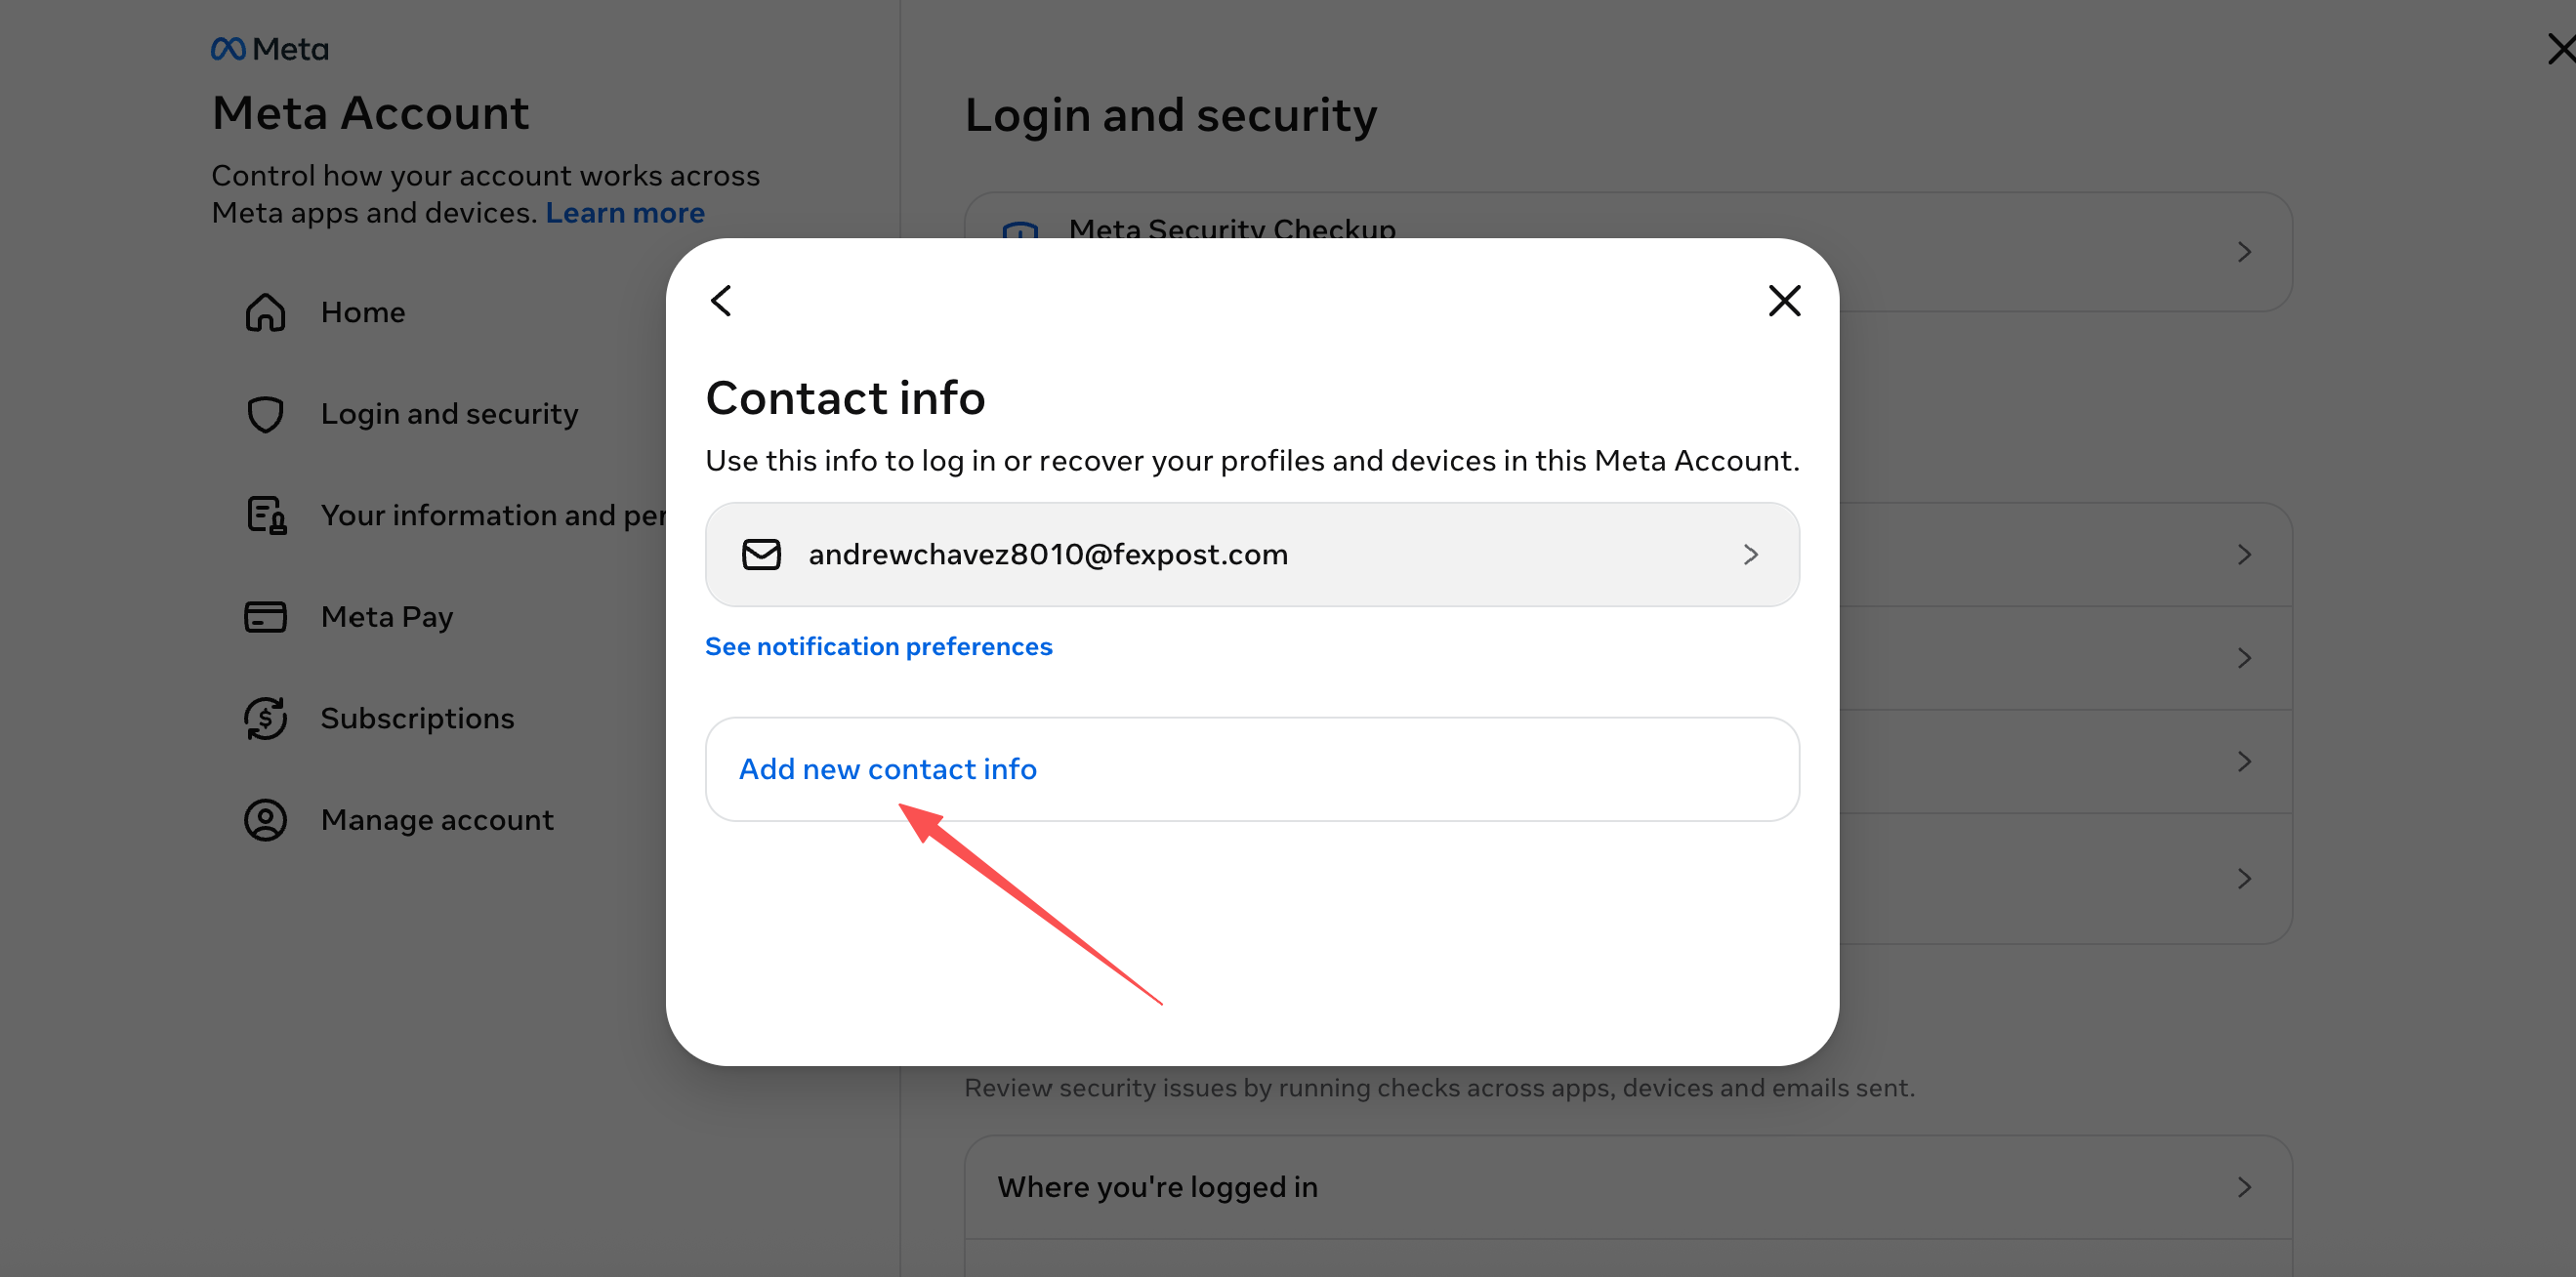
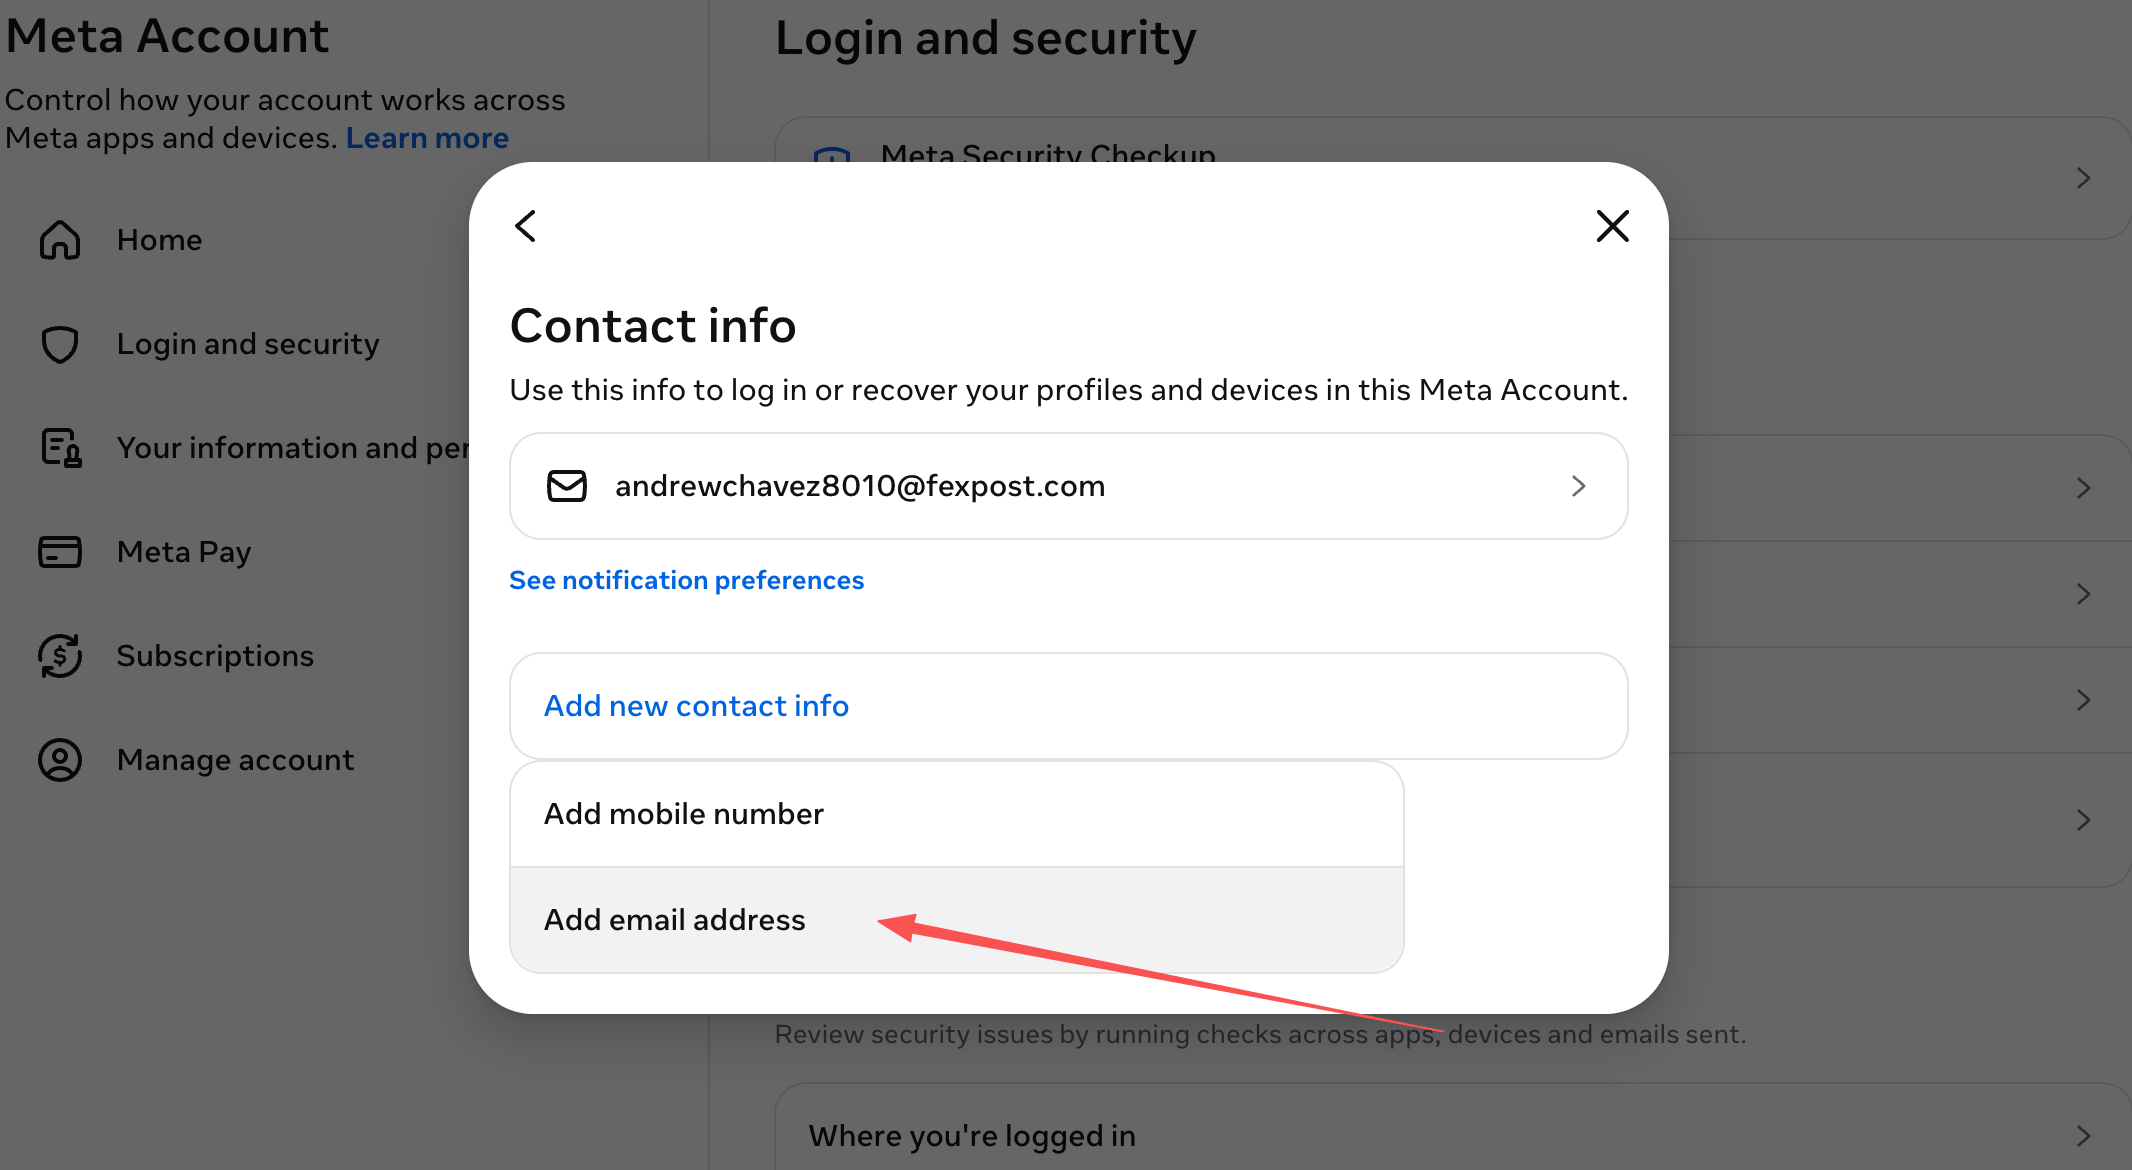
Step 2: Add and verify the new email
Choose to add an email, then enter a new address you plan to keep long-term and can receive mail at.
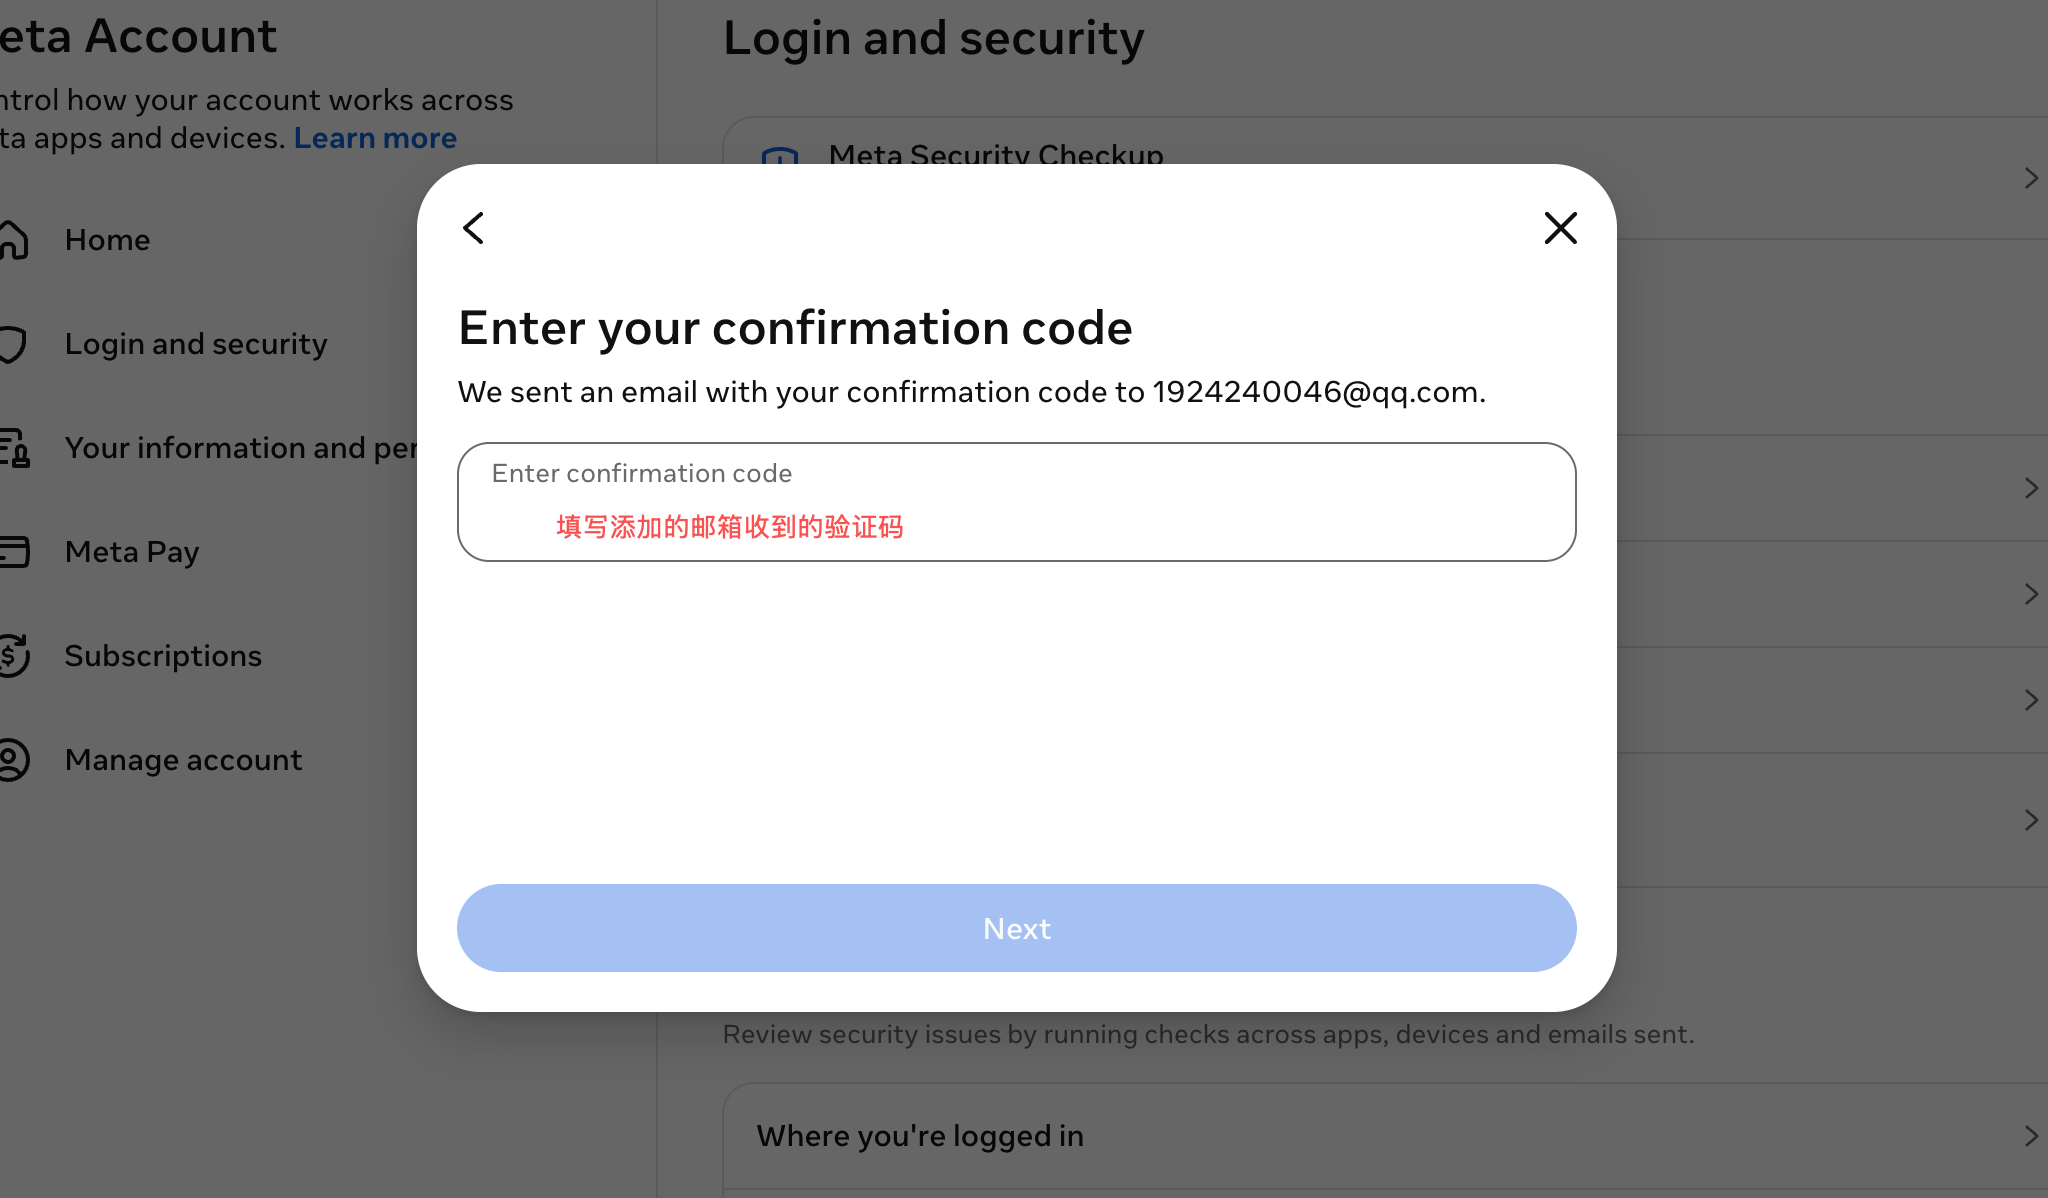
Meta sends a verification code to the new email. Open the new mailbox and enter the code.
Once the page shows the new email as added, do not delete the old one yet. Sign out and sign in once with the new email to confirm it works.
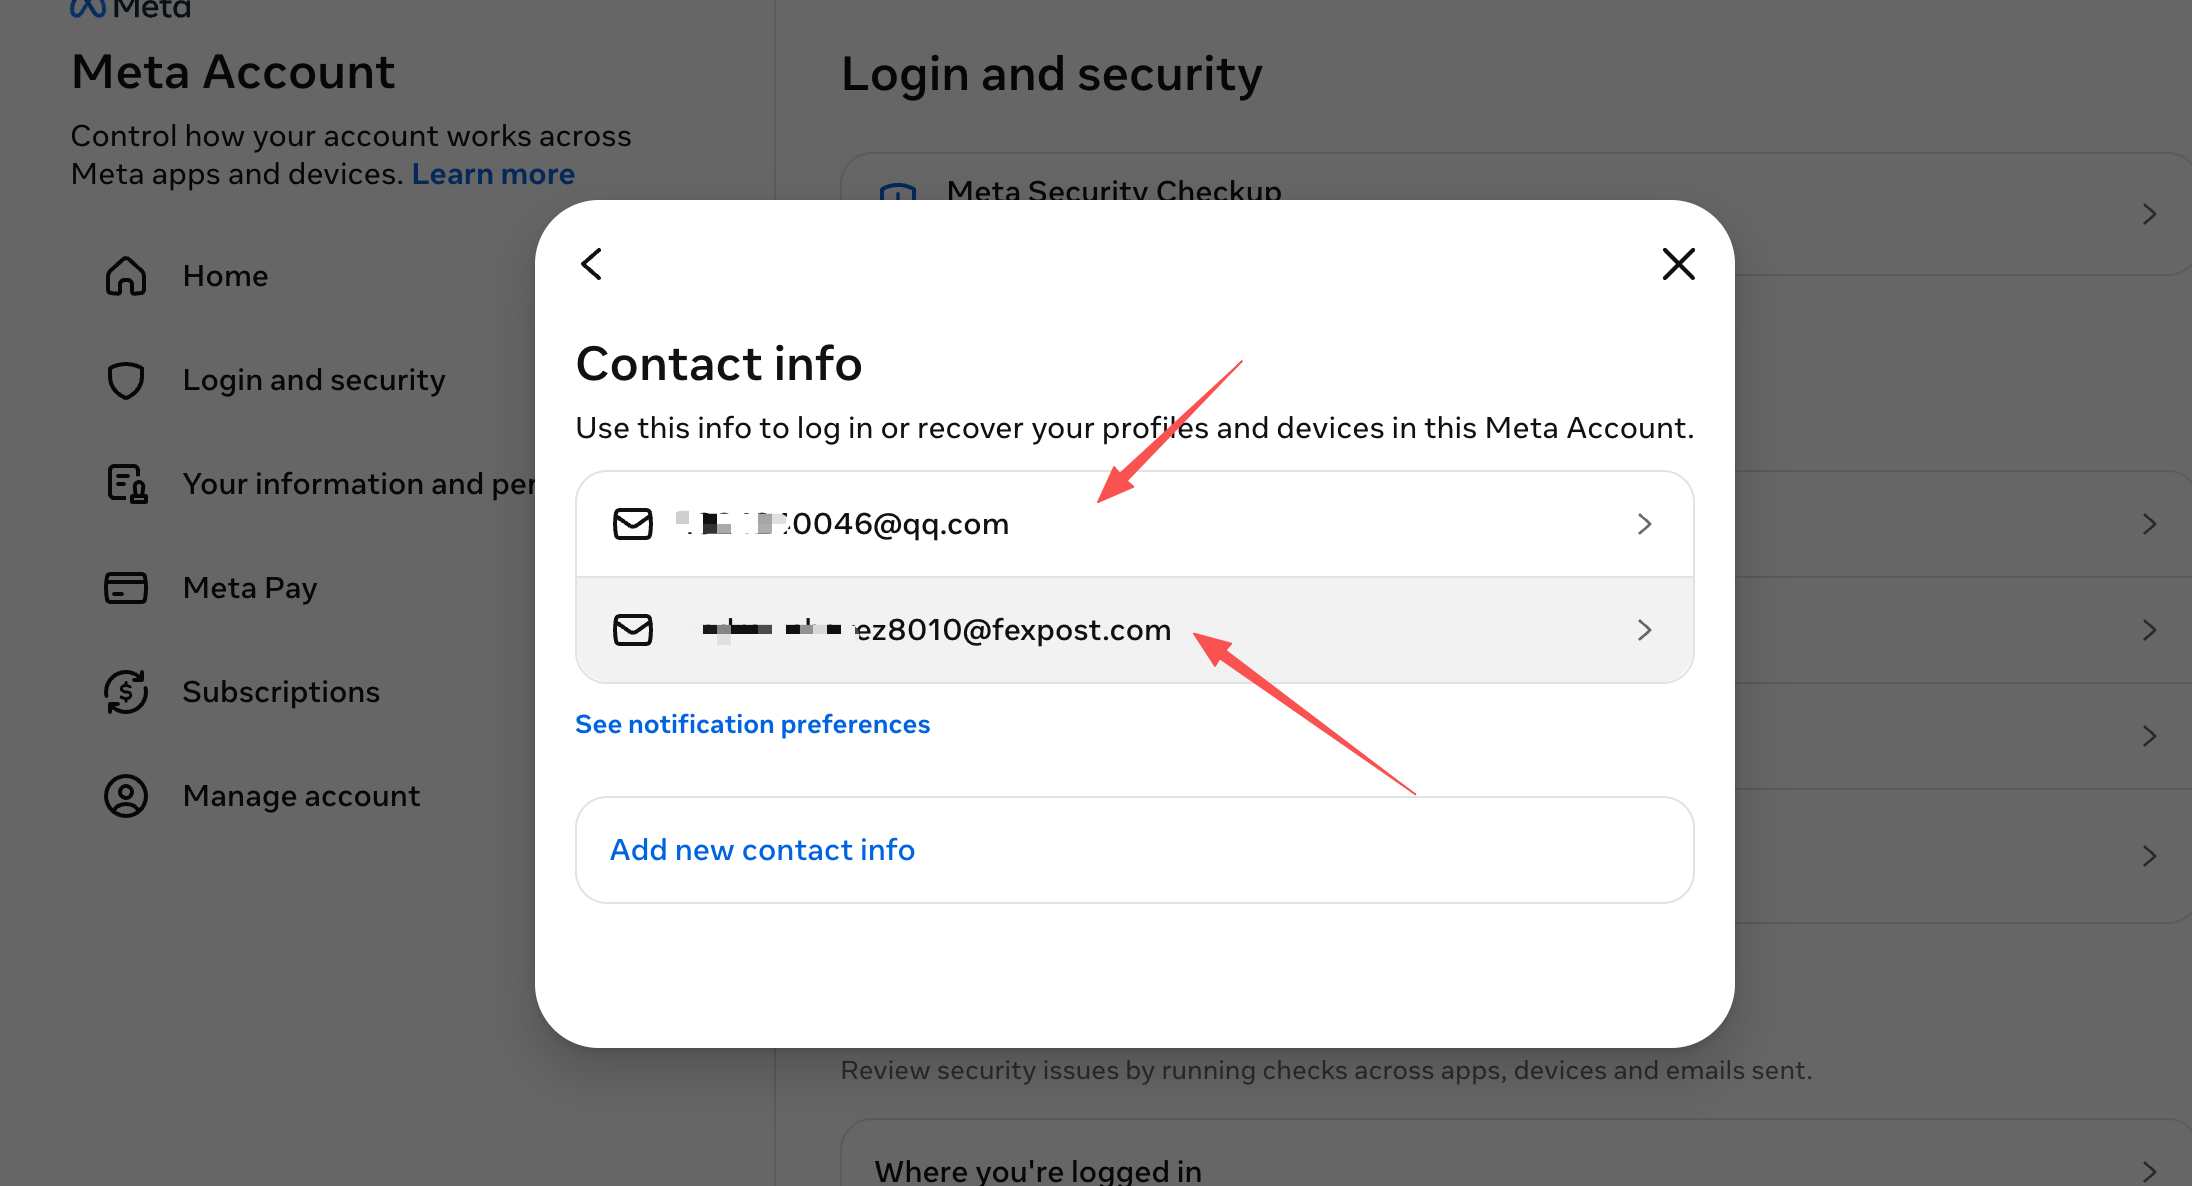
Step 3: Remove the old email after confirming the new one works
Go back to the email list and select the old email you want to remove.
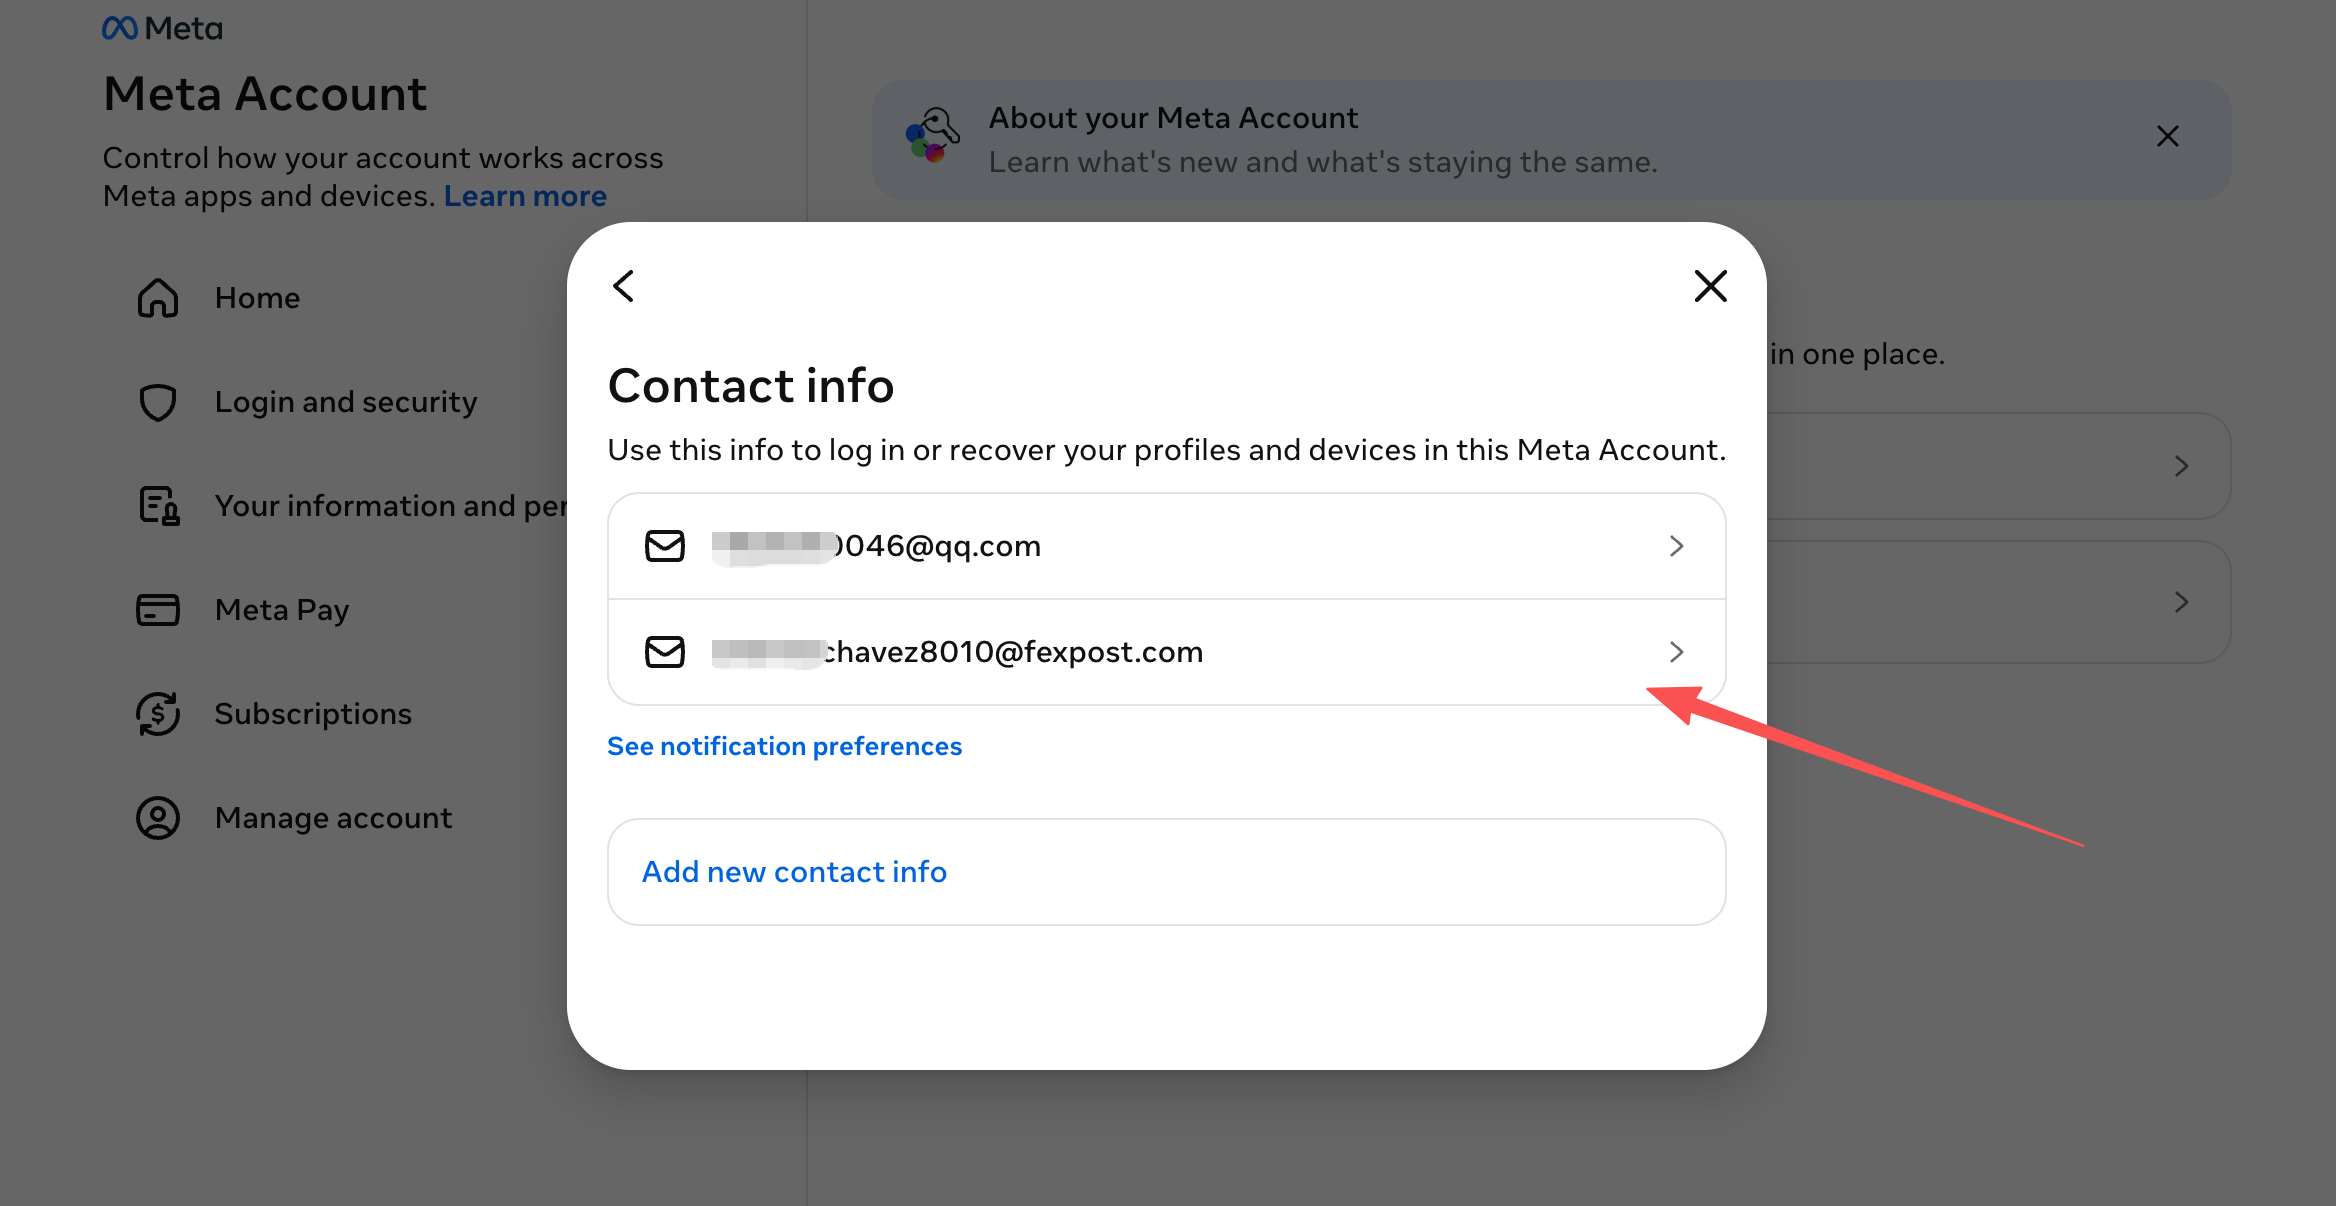
Click Delete email.
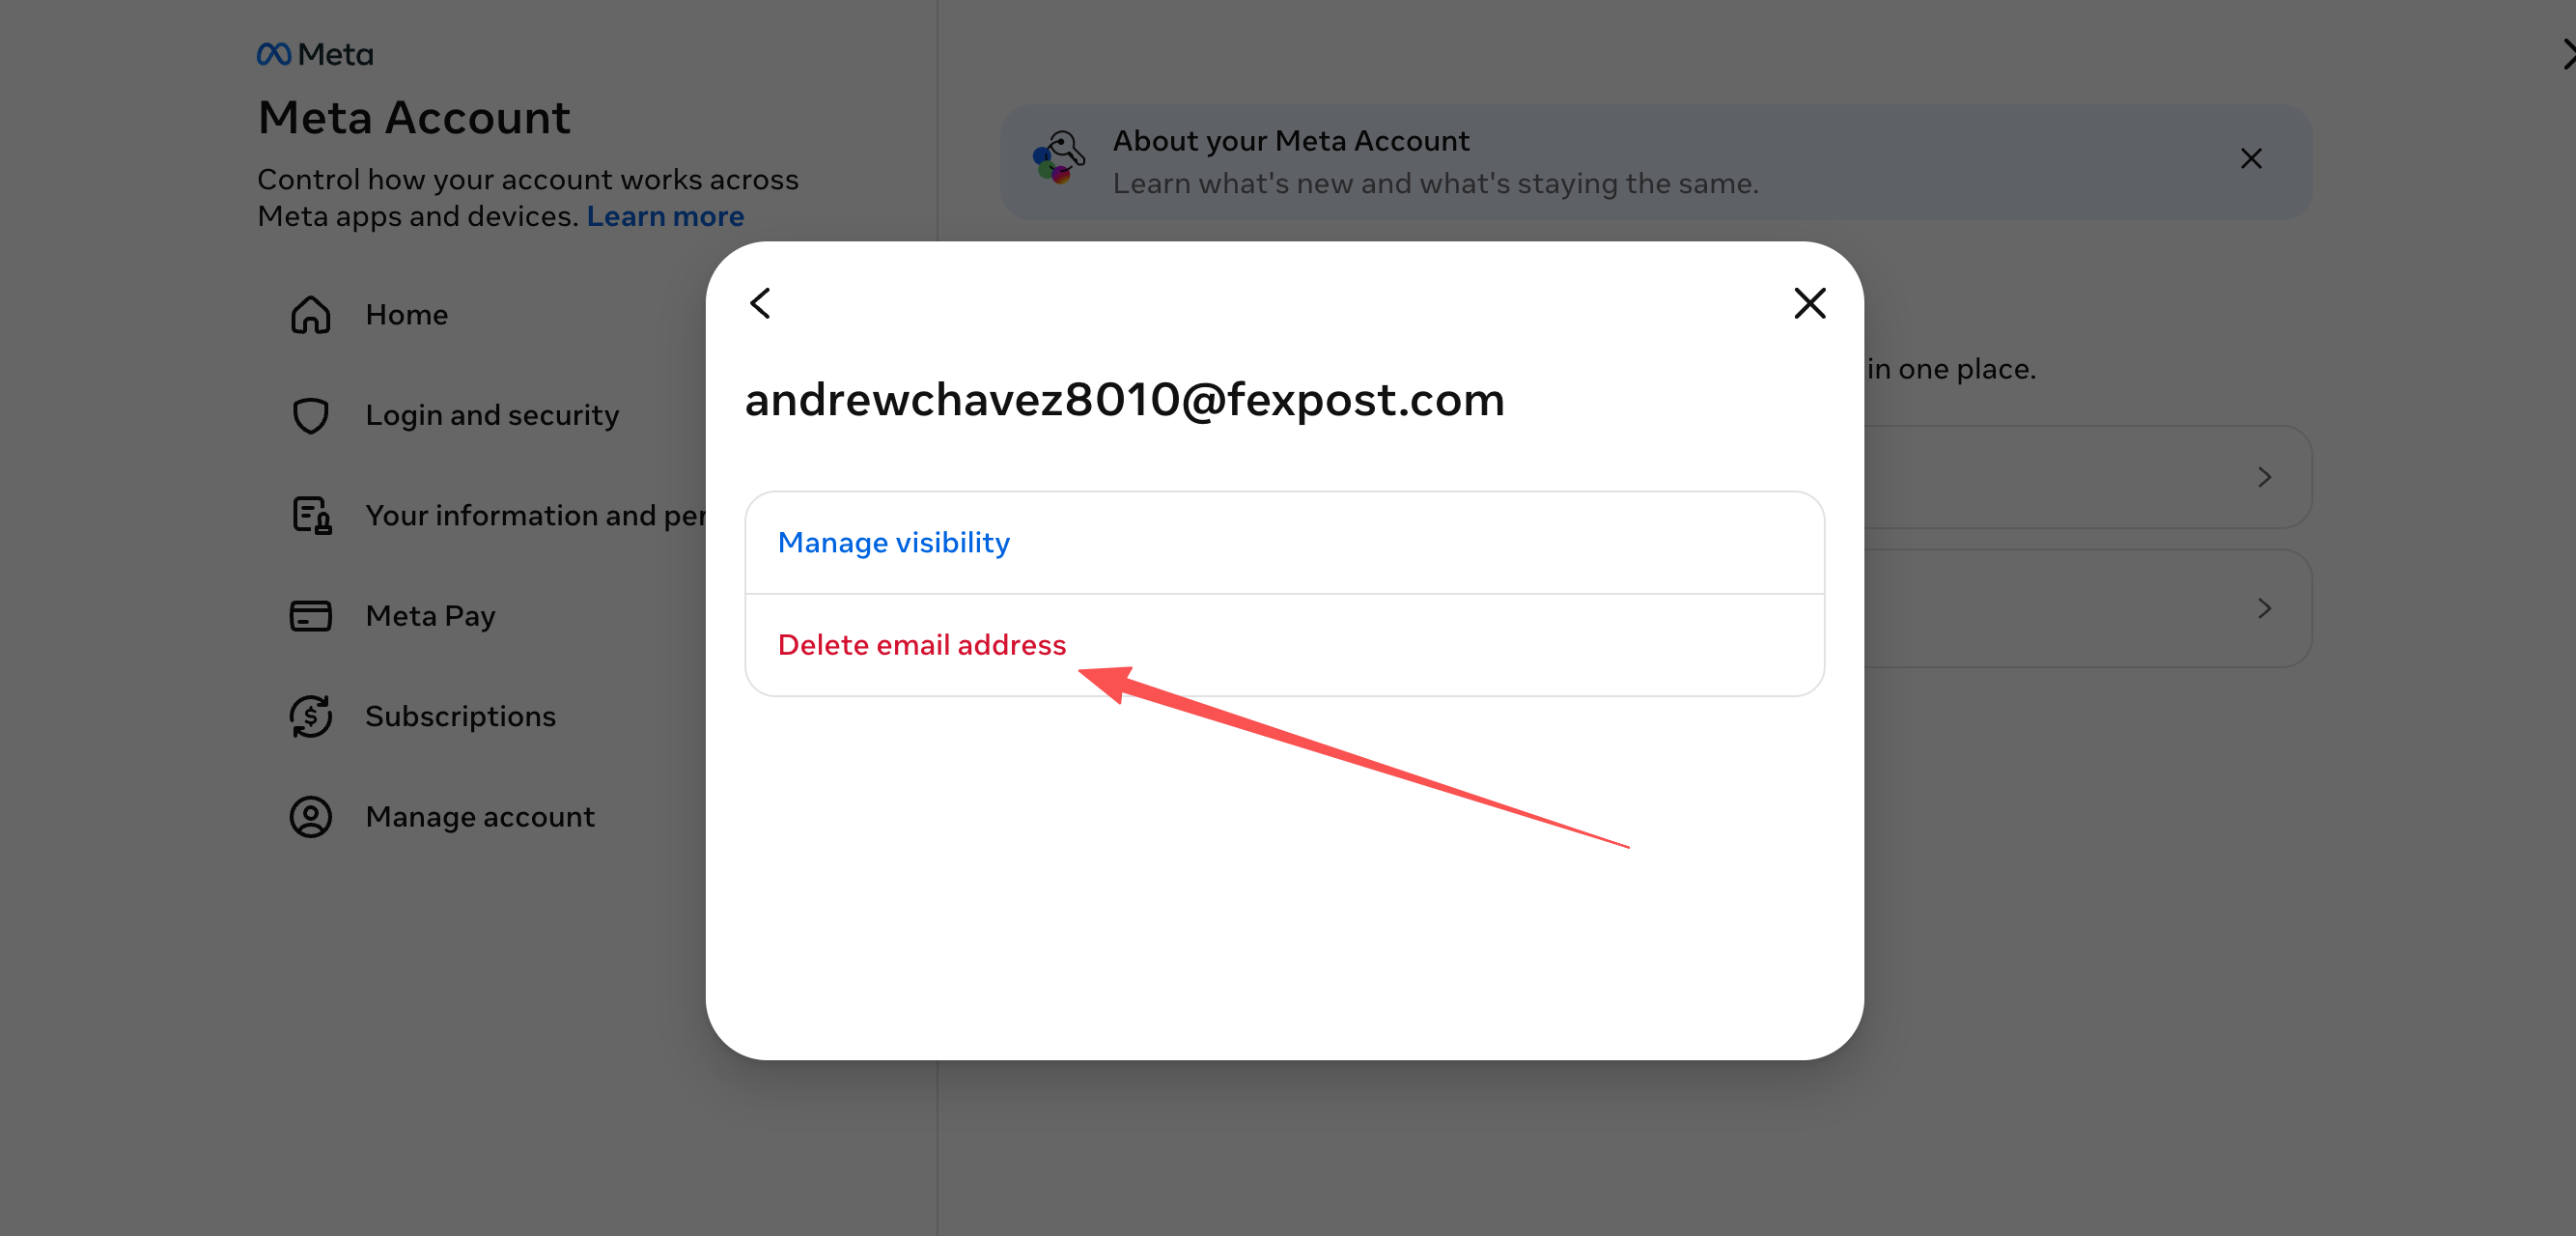
Read the dialog and confirm the deletion. If that email is still the only usable sign-in or recovery method, the system may not allow removing it; in that case, confirm the new email has been verified first.
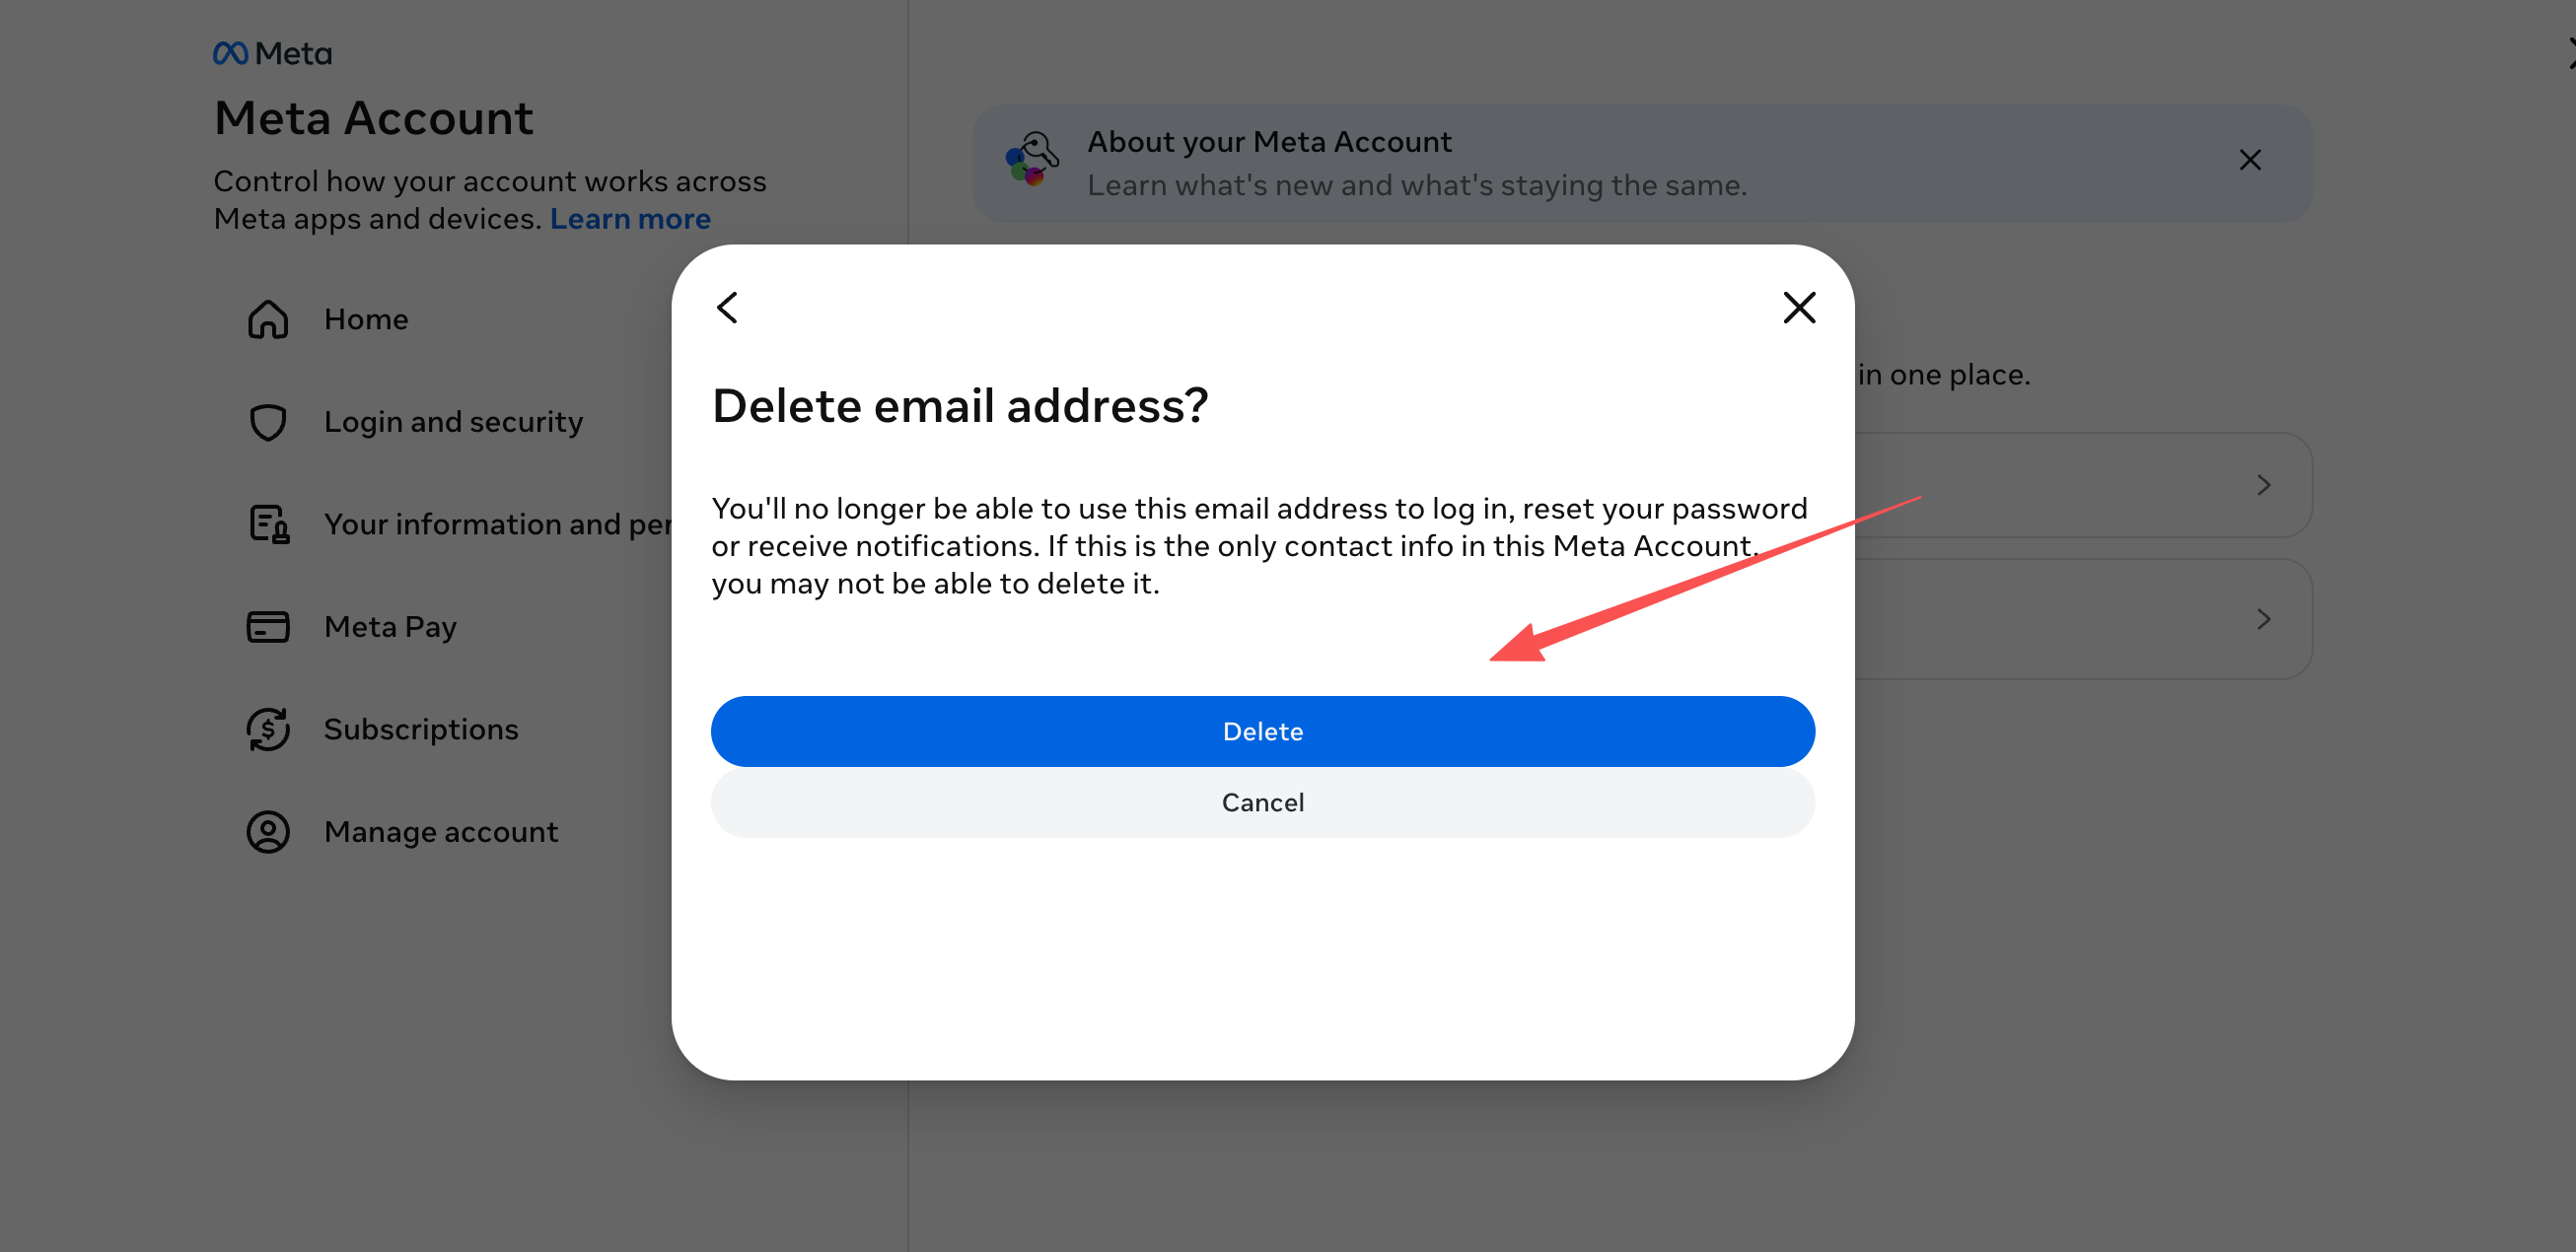
After deleting, check that the list keeps only the email you intend to use.
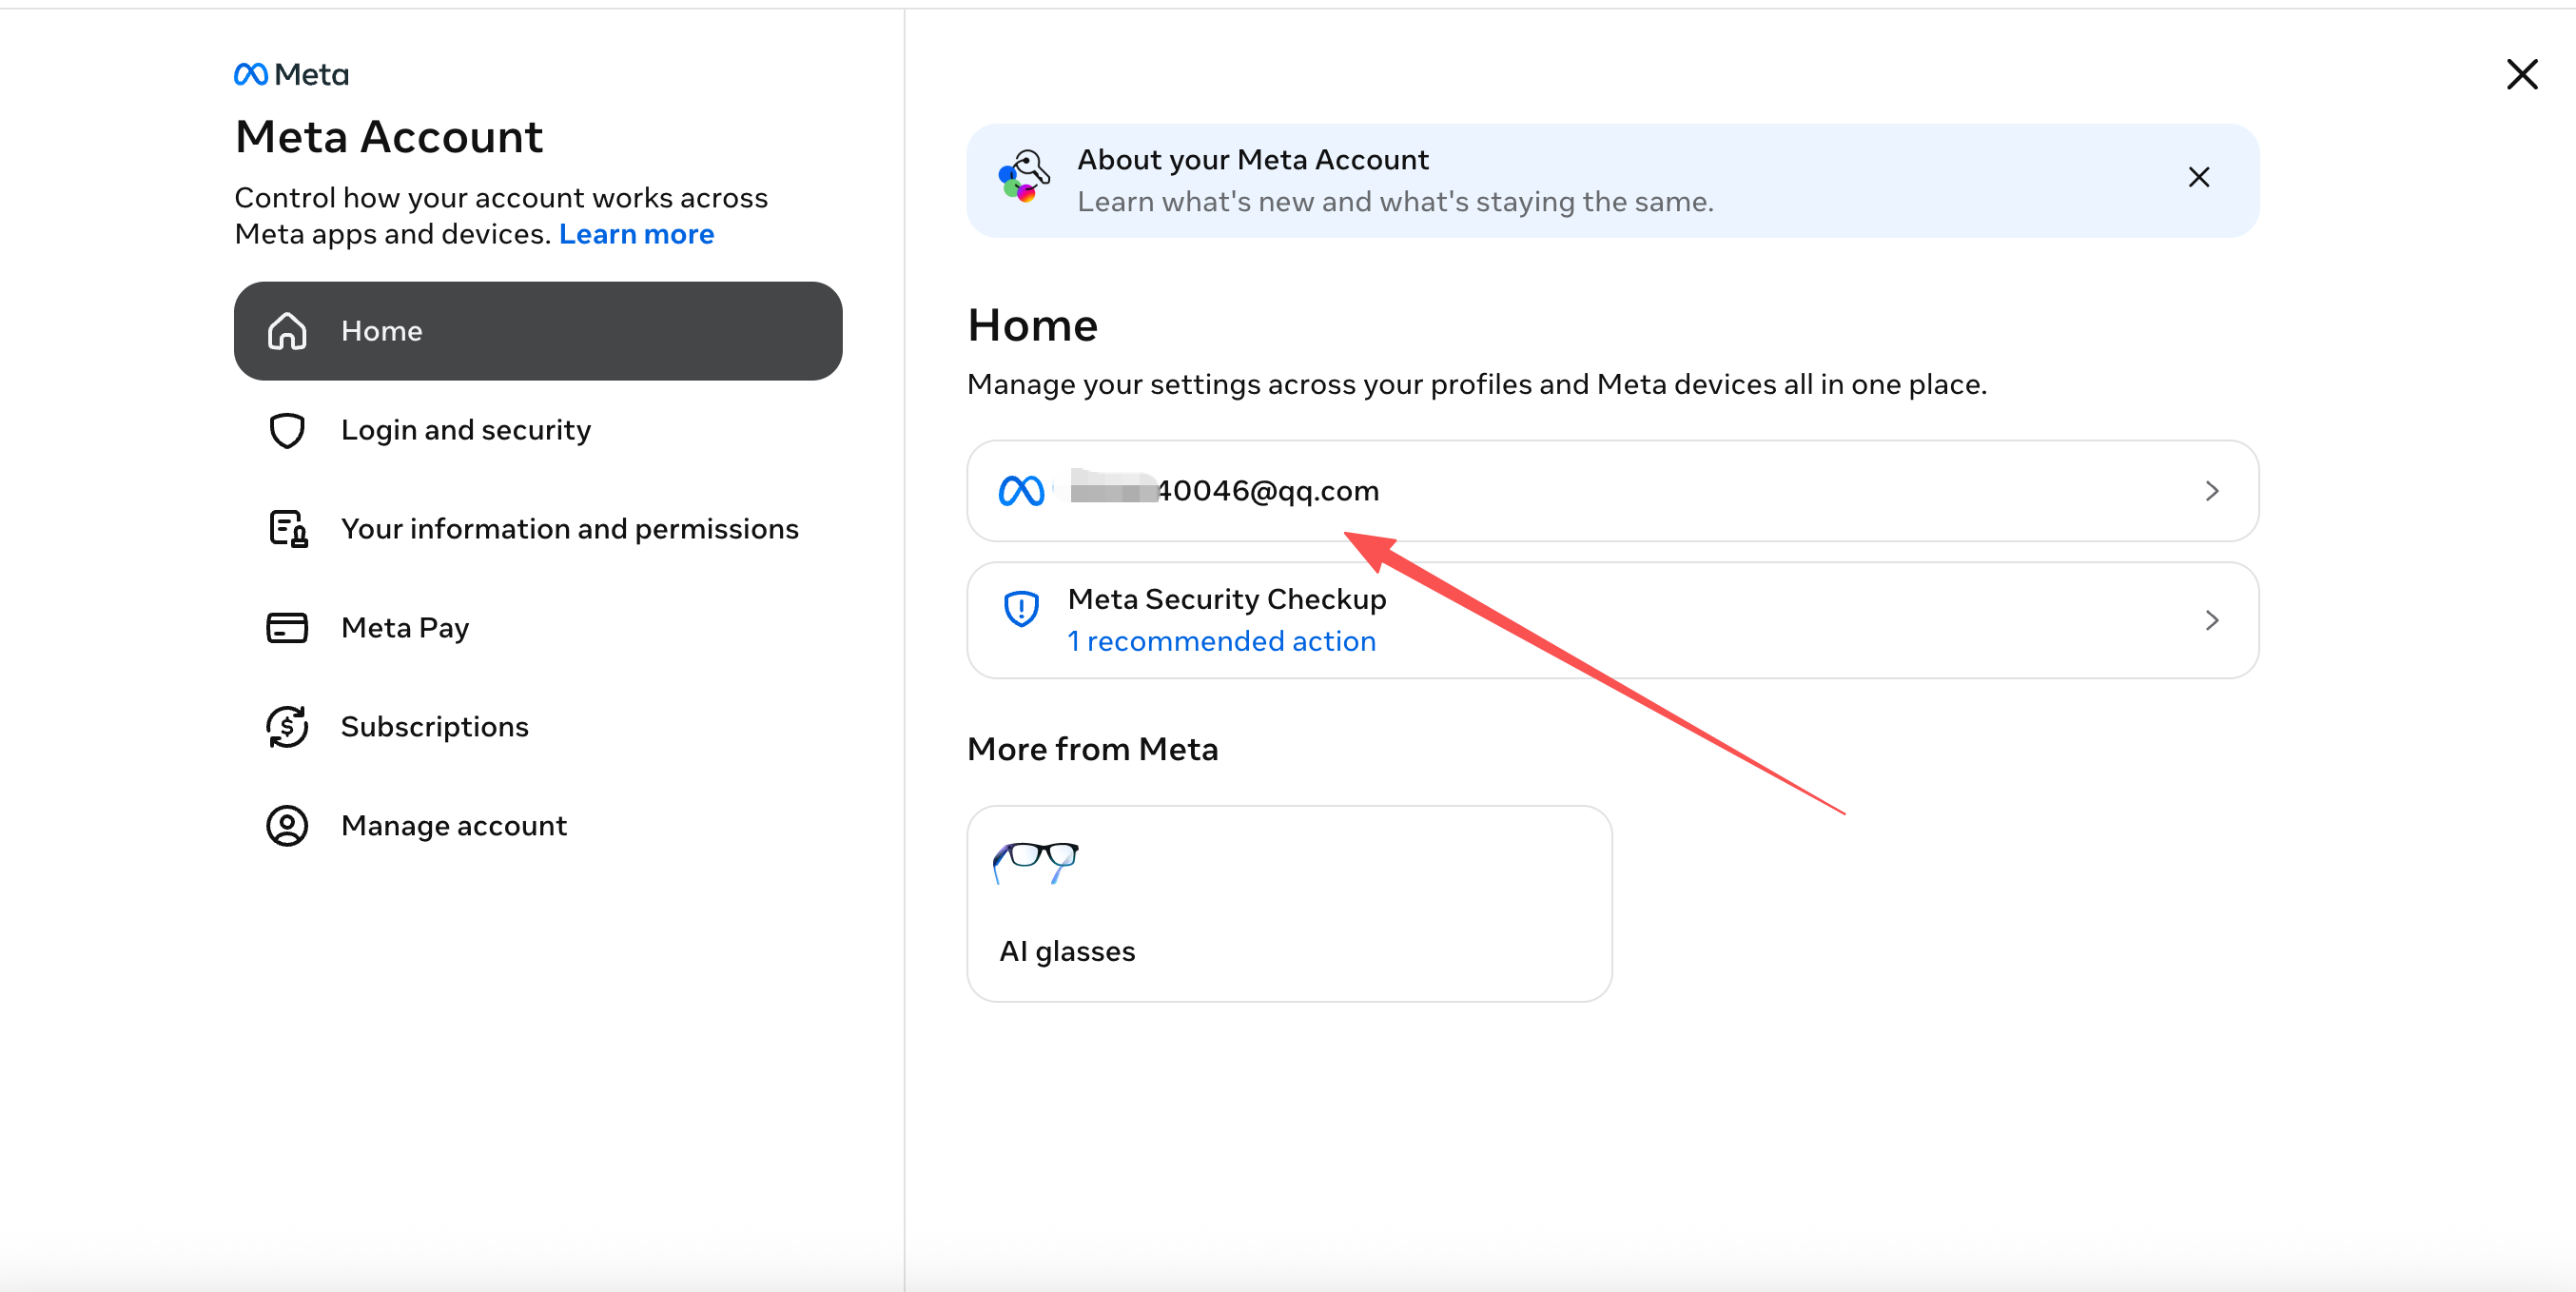
3. Sign out devices used before
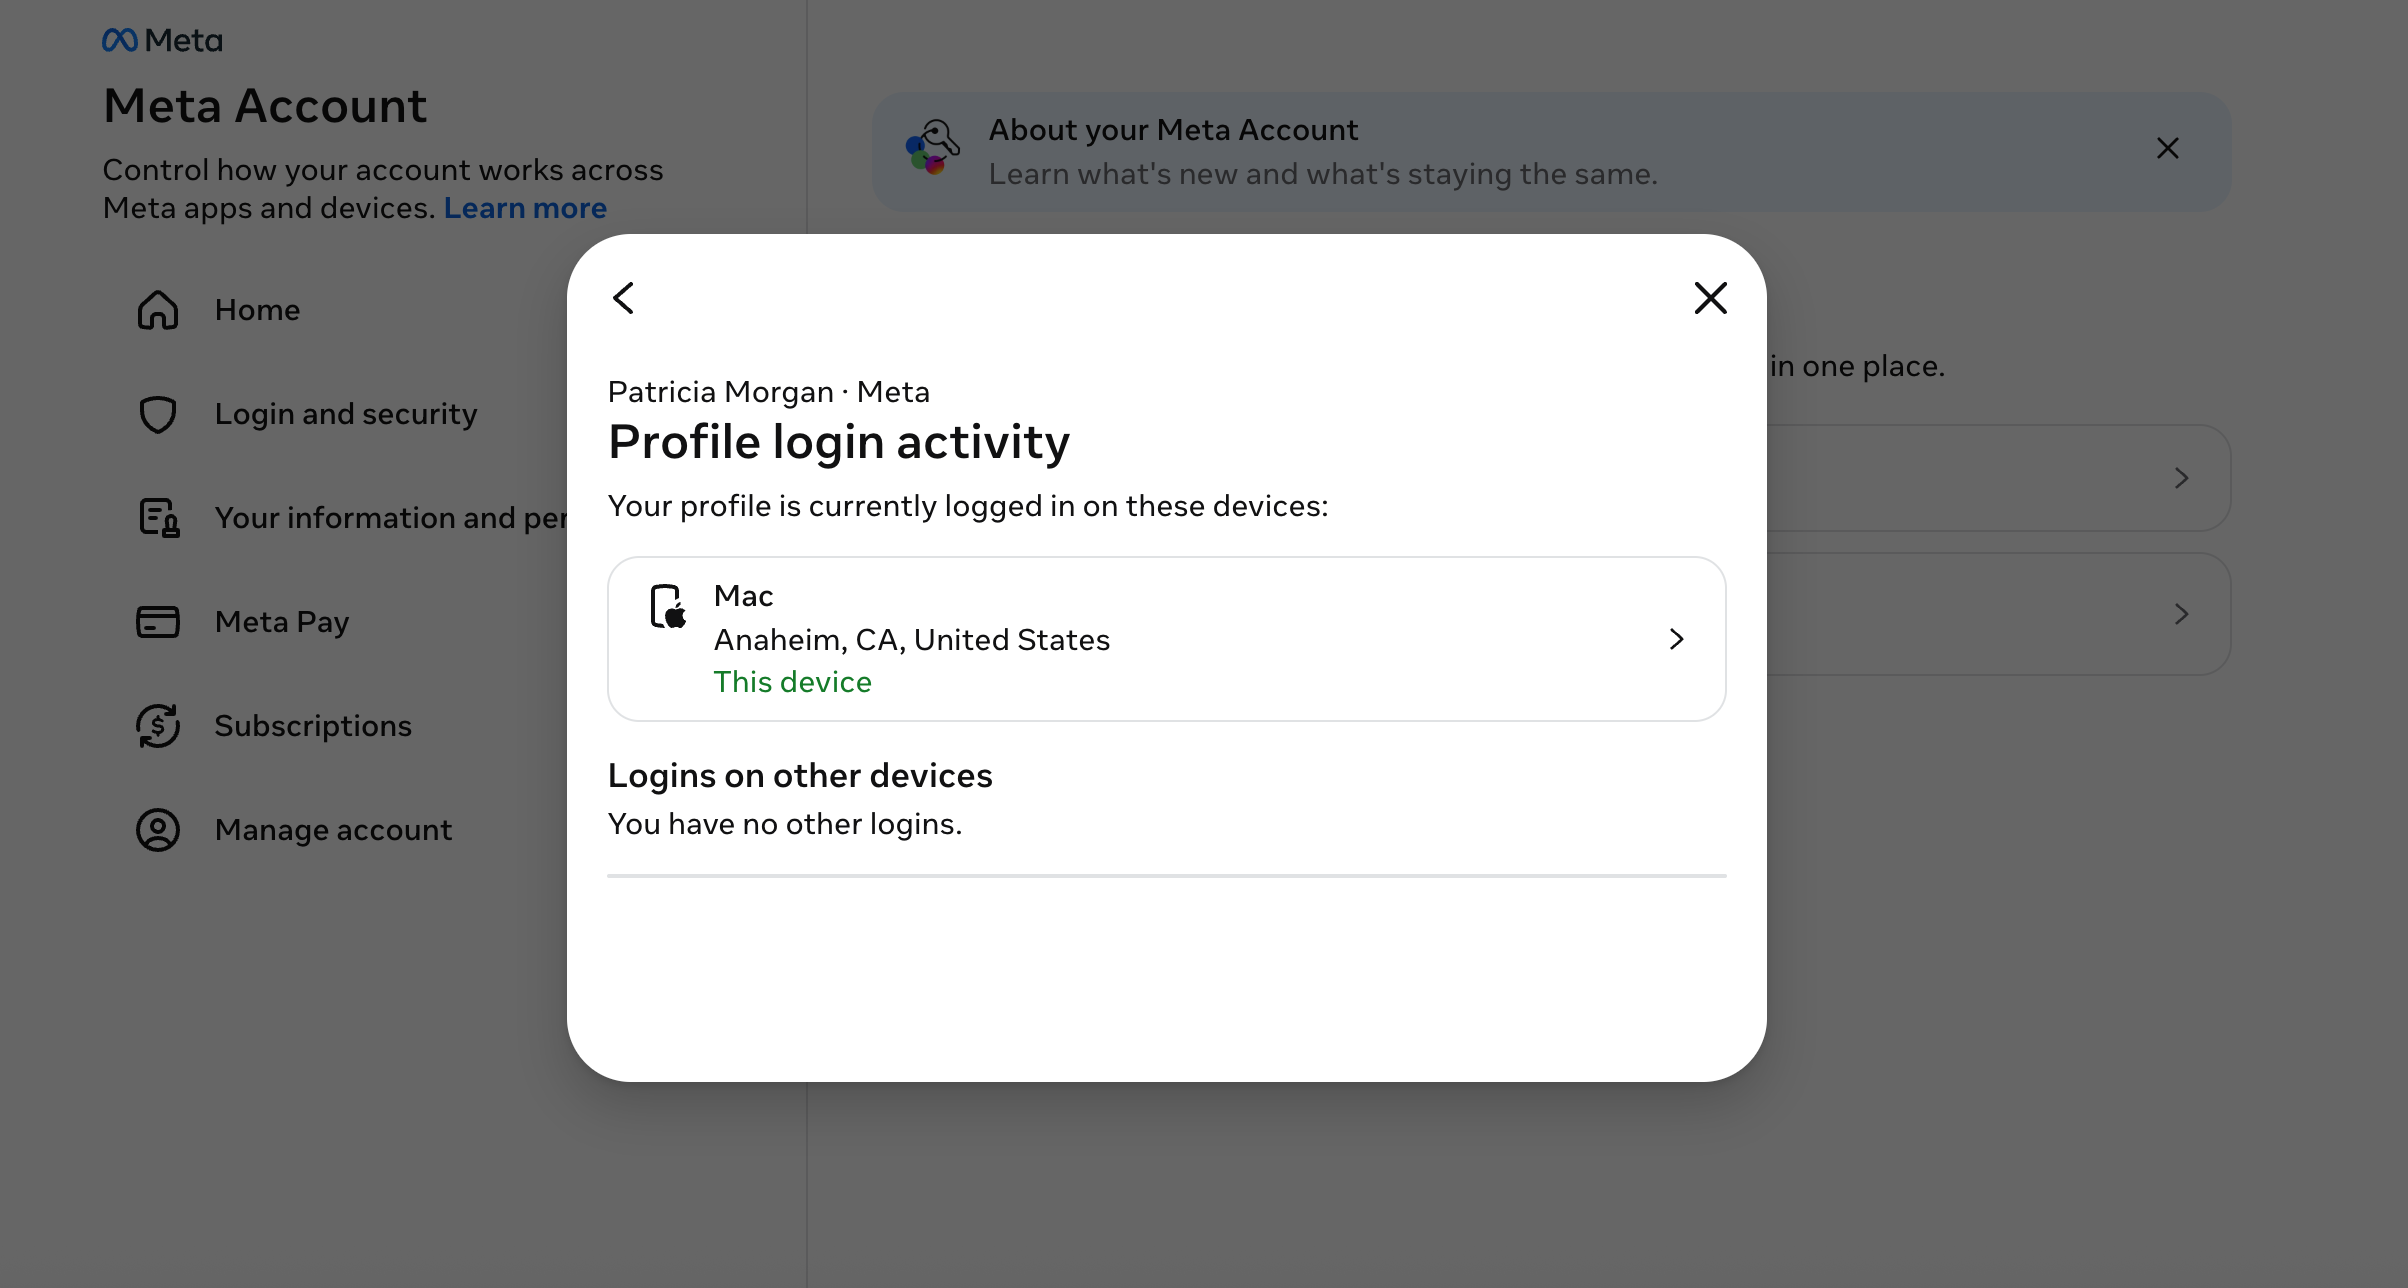
If the account was signed in on an old computer, a shared device or an unrecognized browser, check the sessions and sign them out right away. Once signed out, that device has to sign in again the next time it uses Muse.
Step 1: View signed-in devices
On the Login and security page, open Where you're logged in to see the devices and browsers that are signed in.
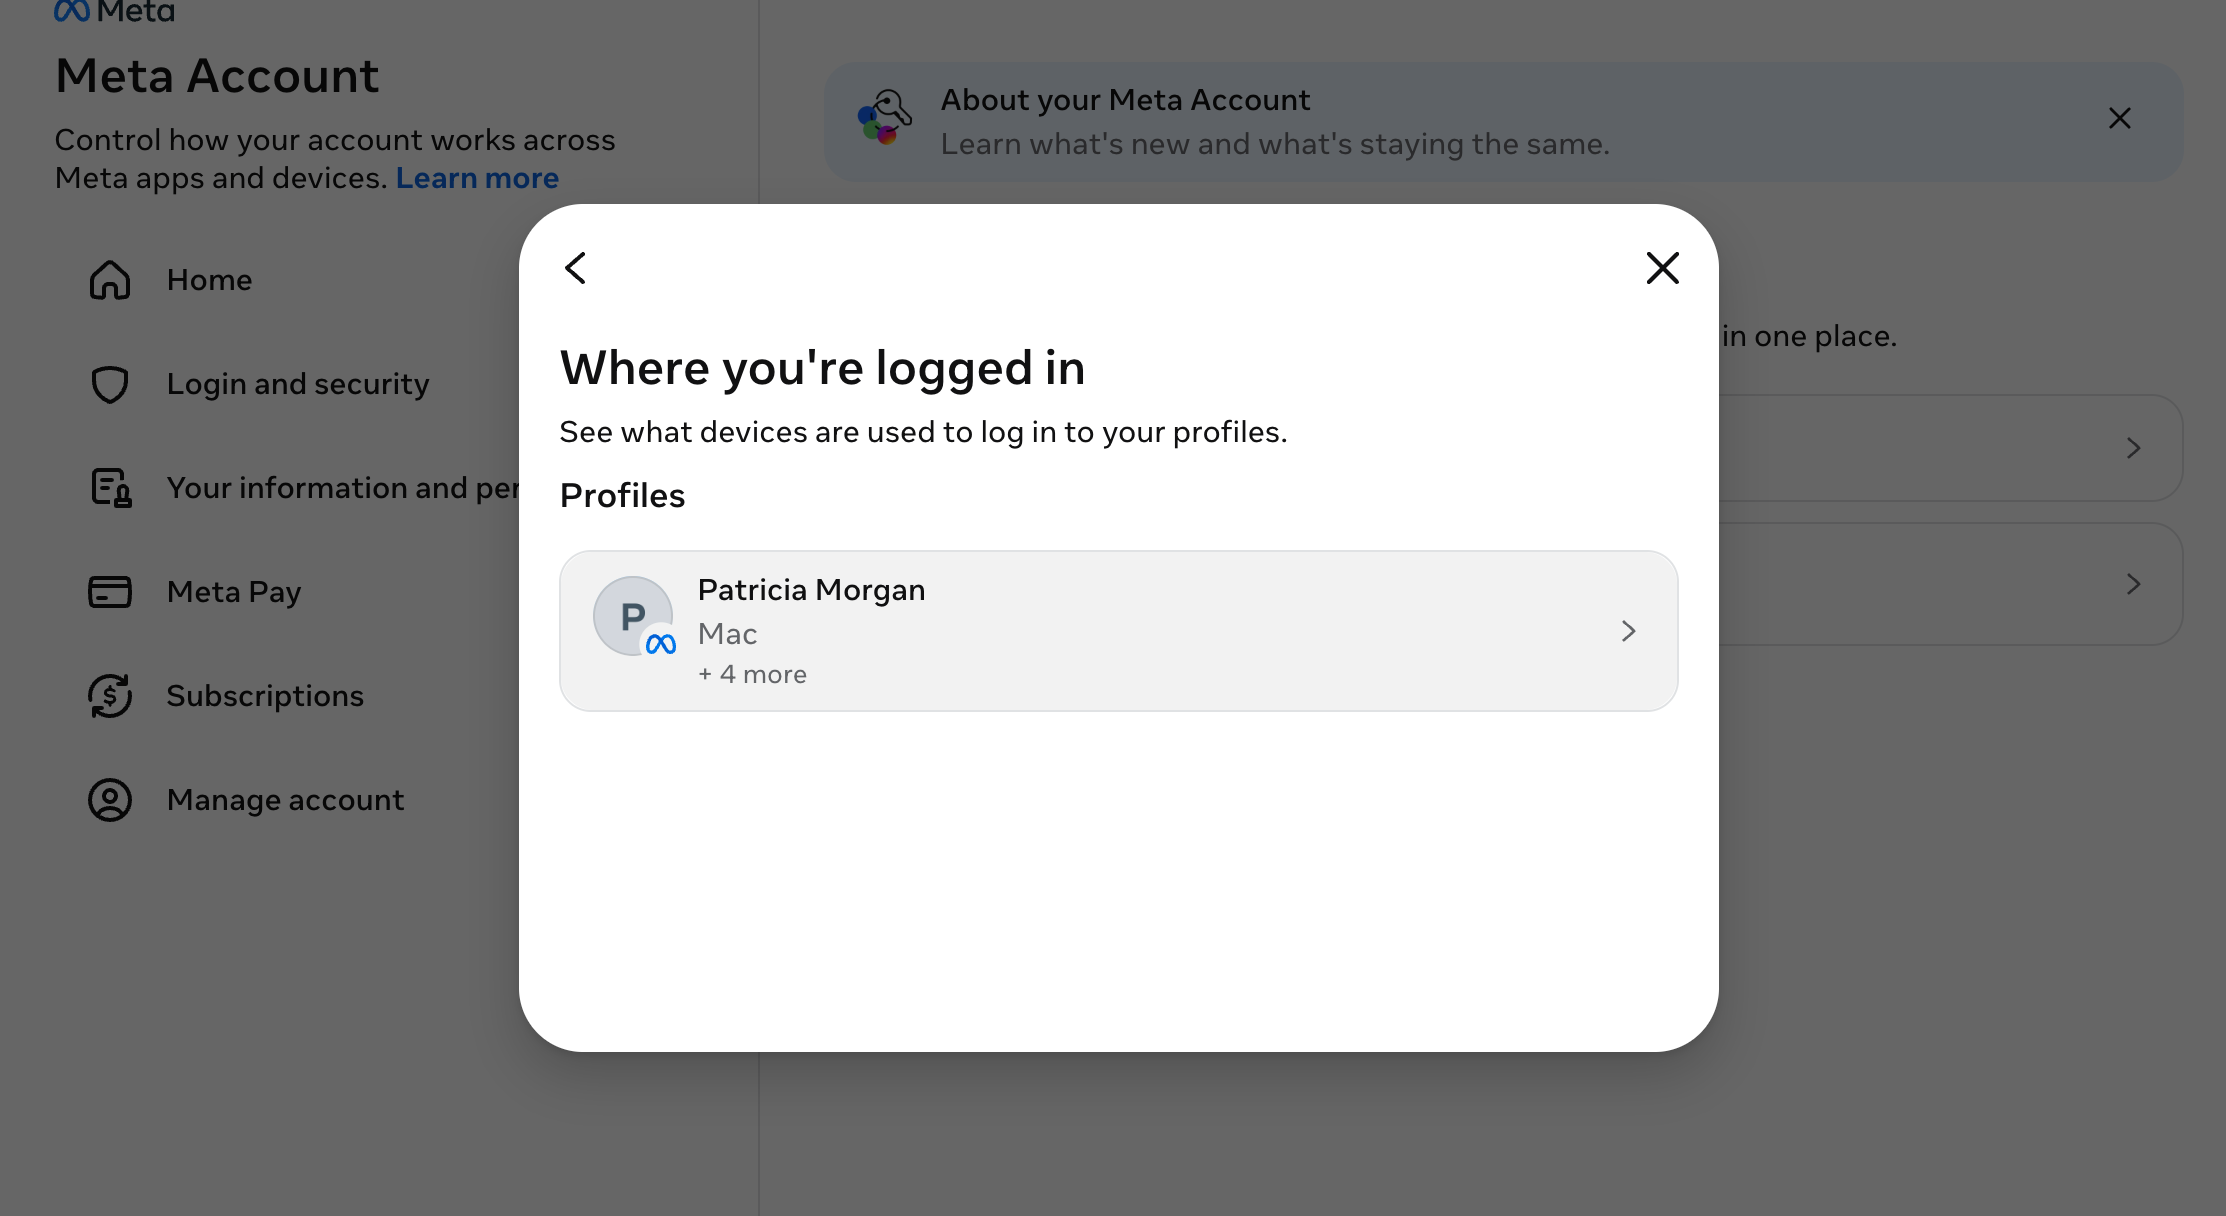
Step 2: Sign out one old device
Select a device you no longer use or cannot confirm, then click sign out.
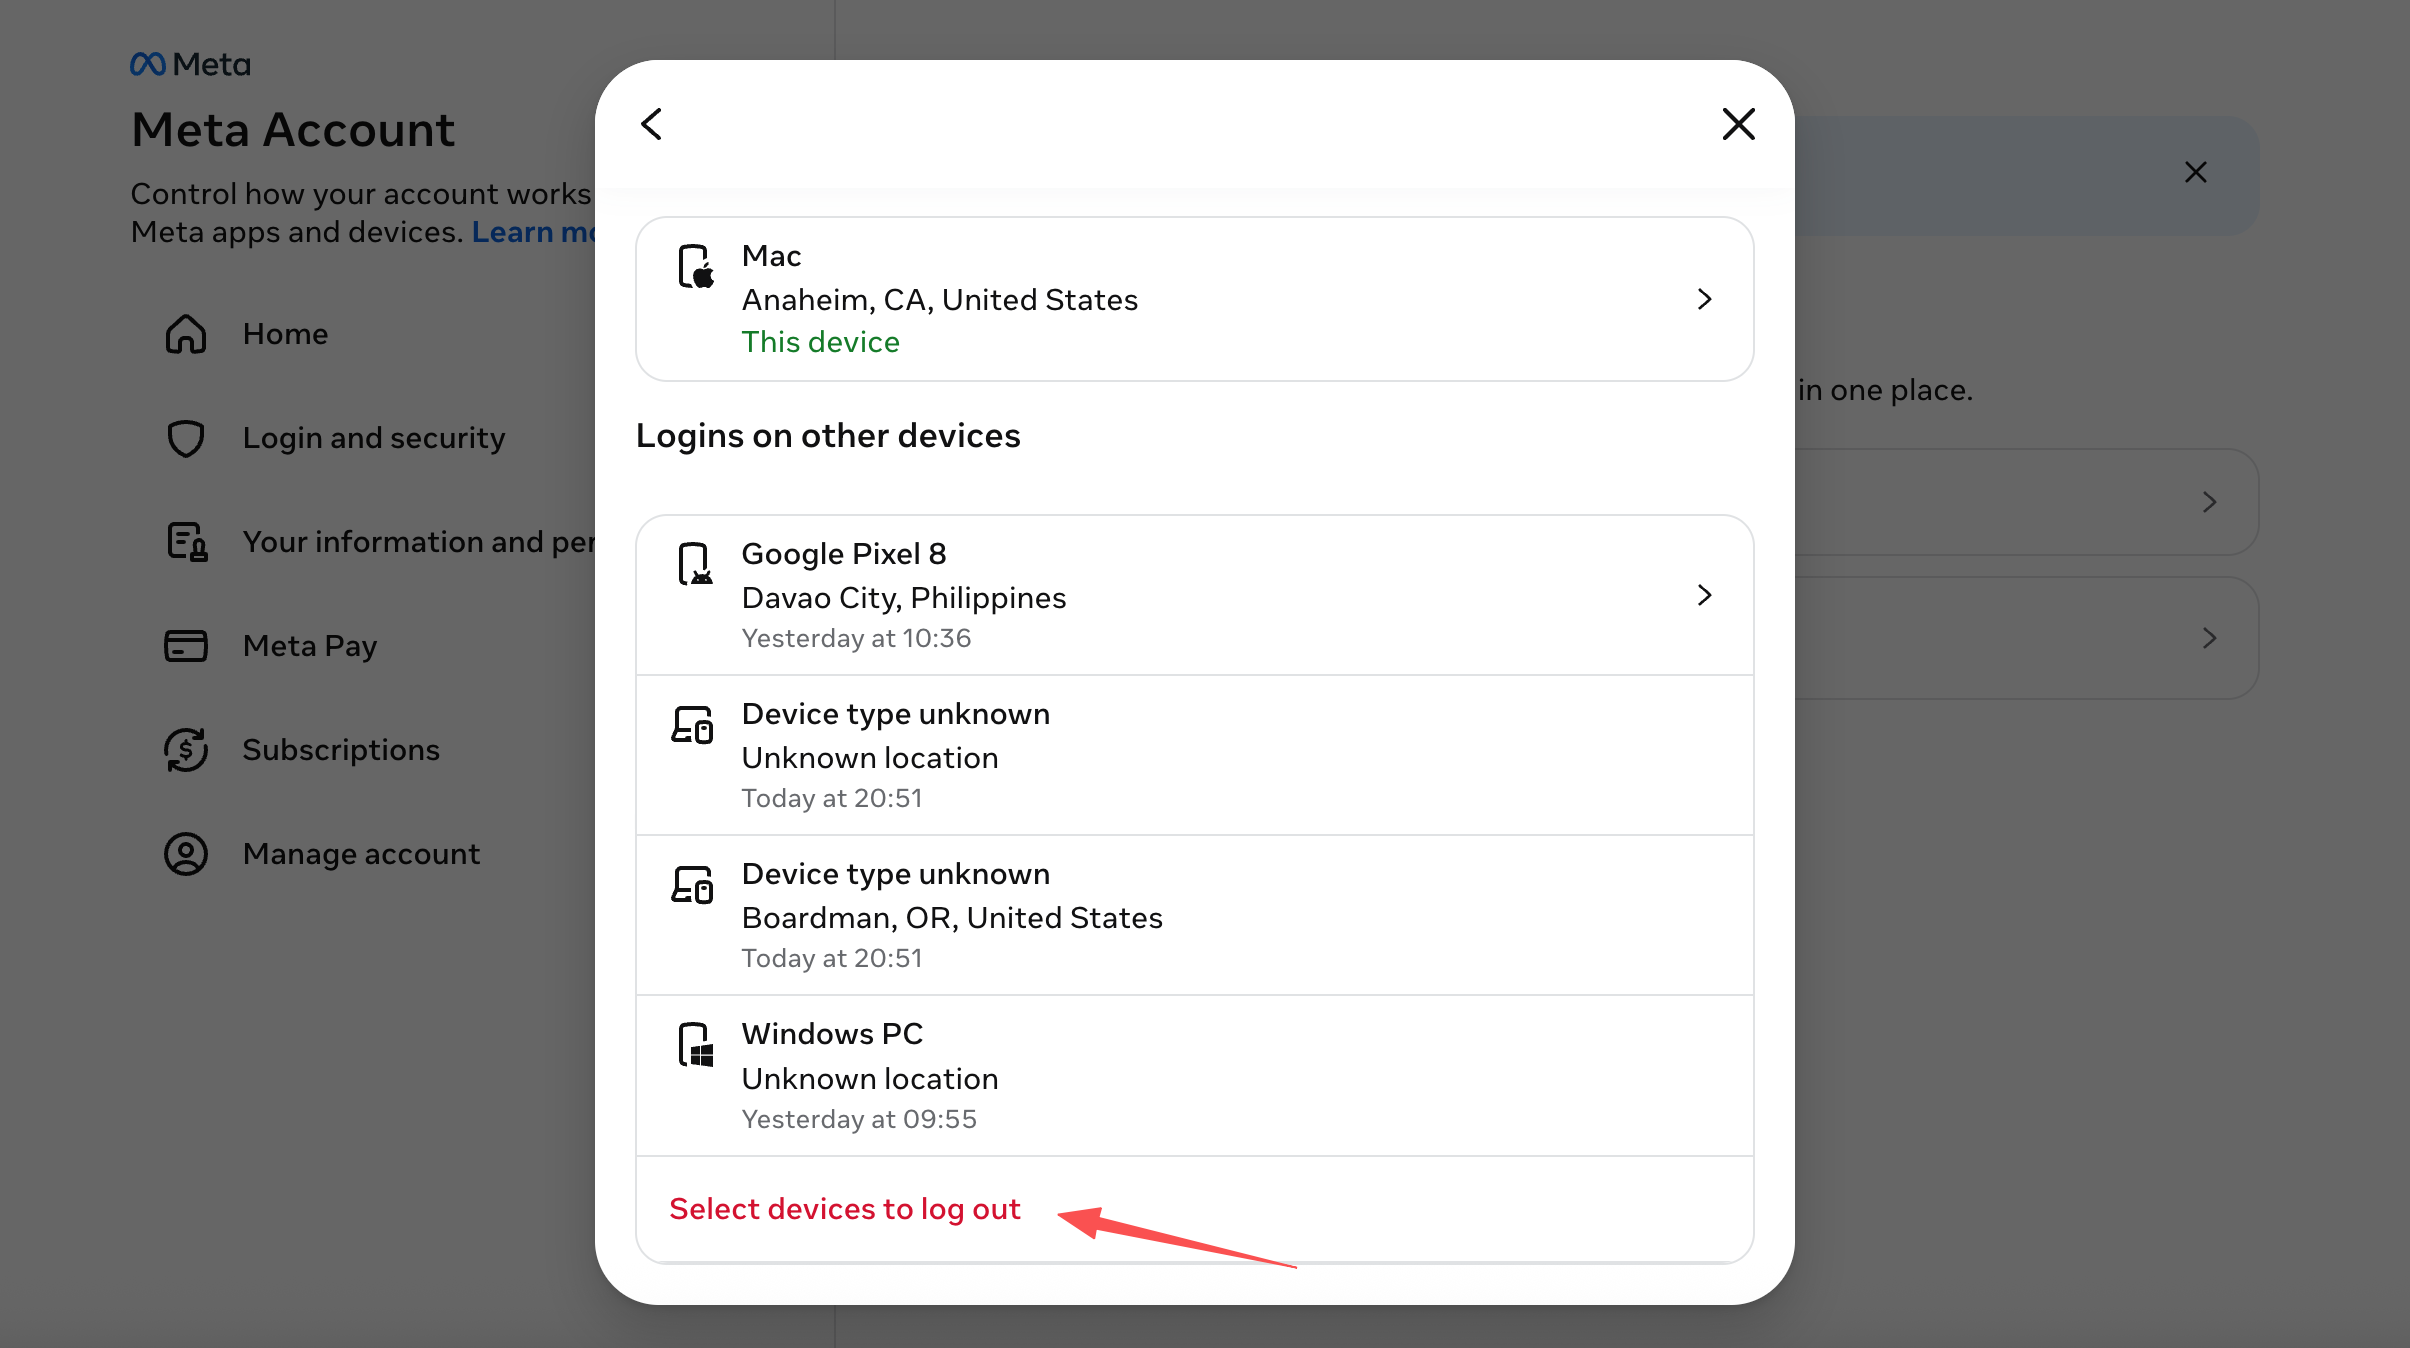
Choose Log out in the confirmation dialog.
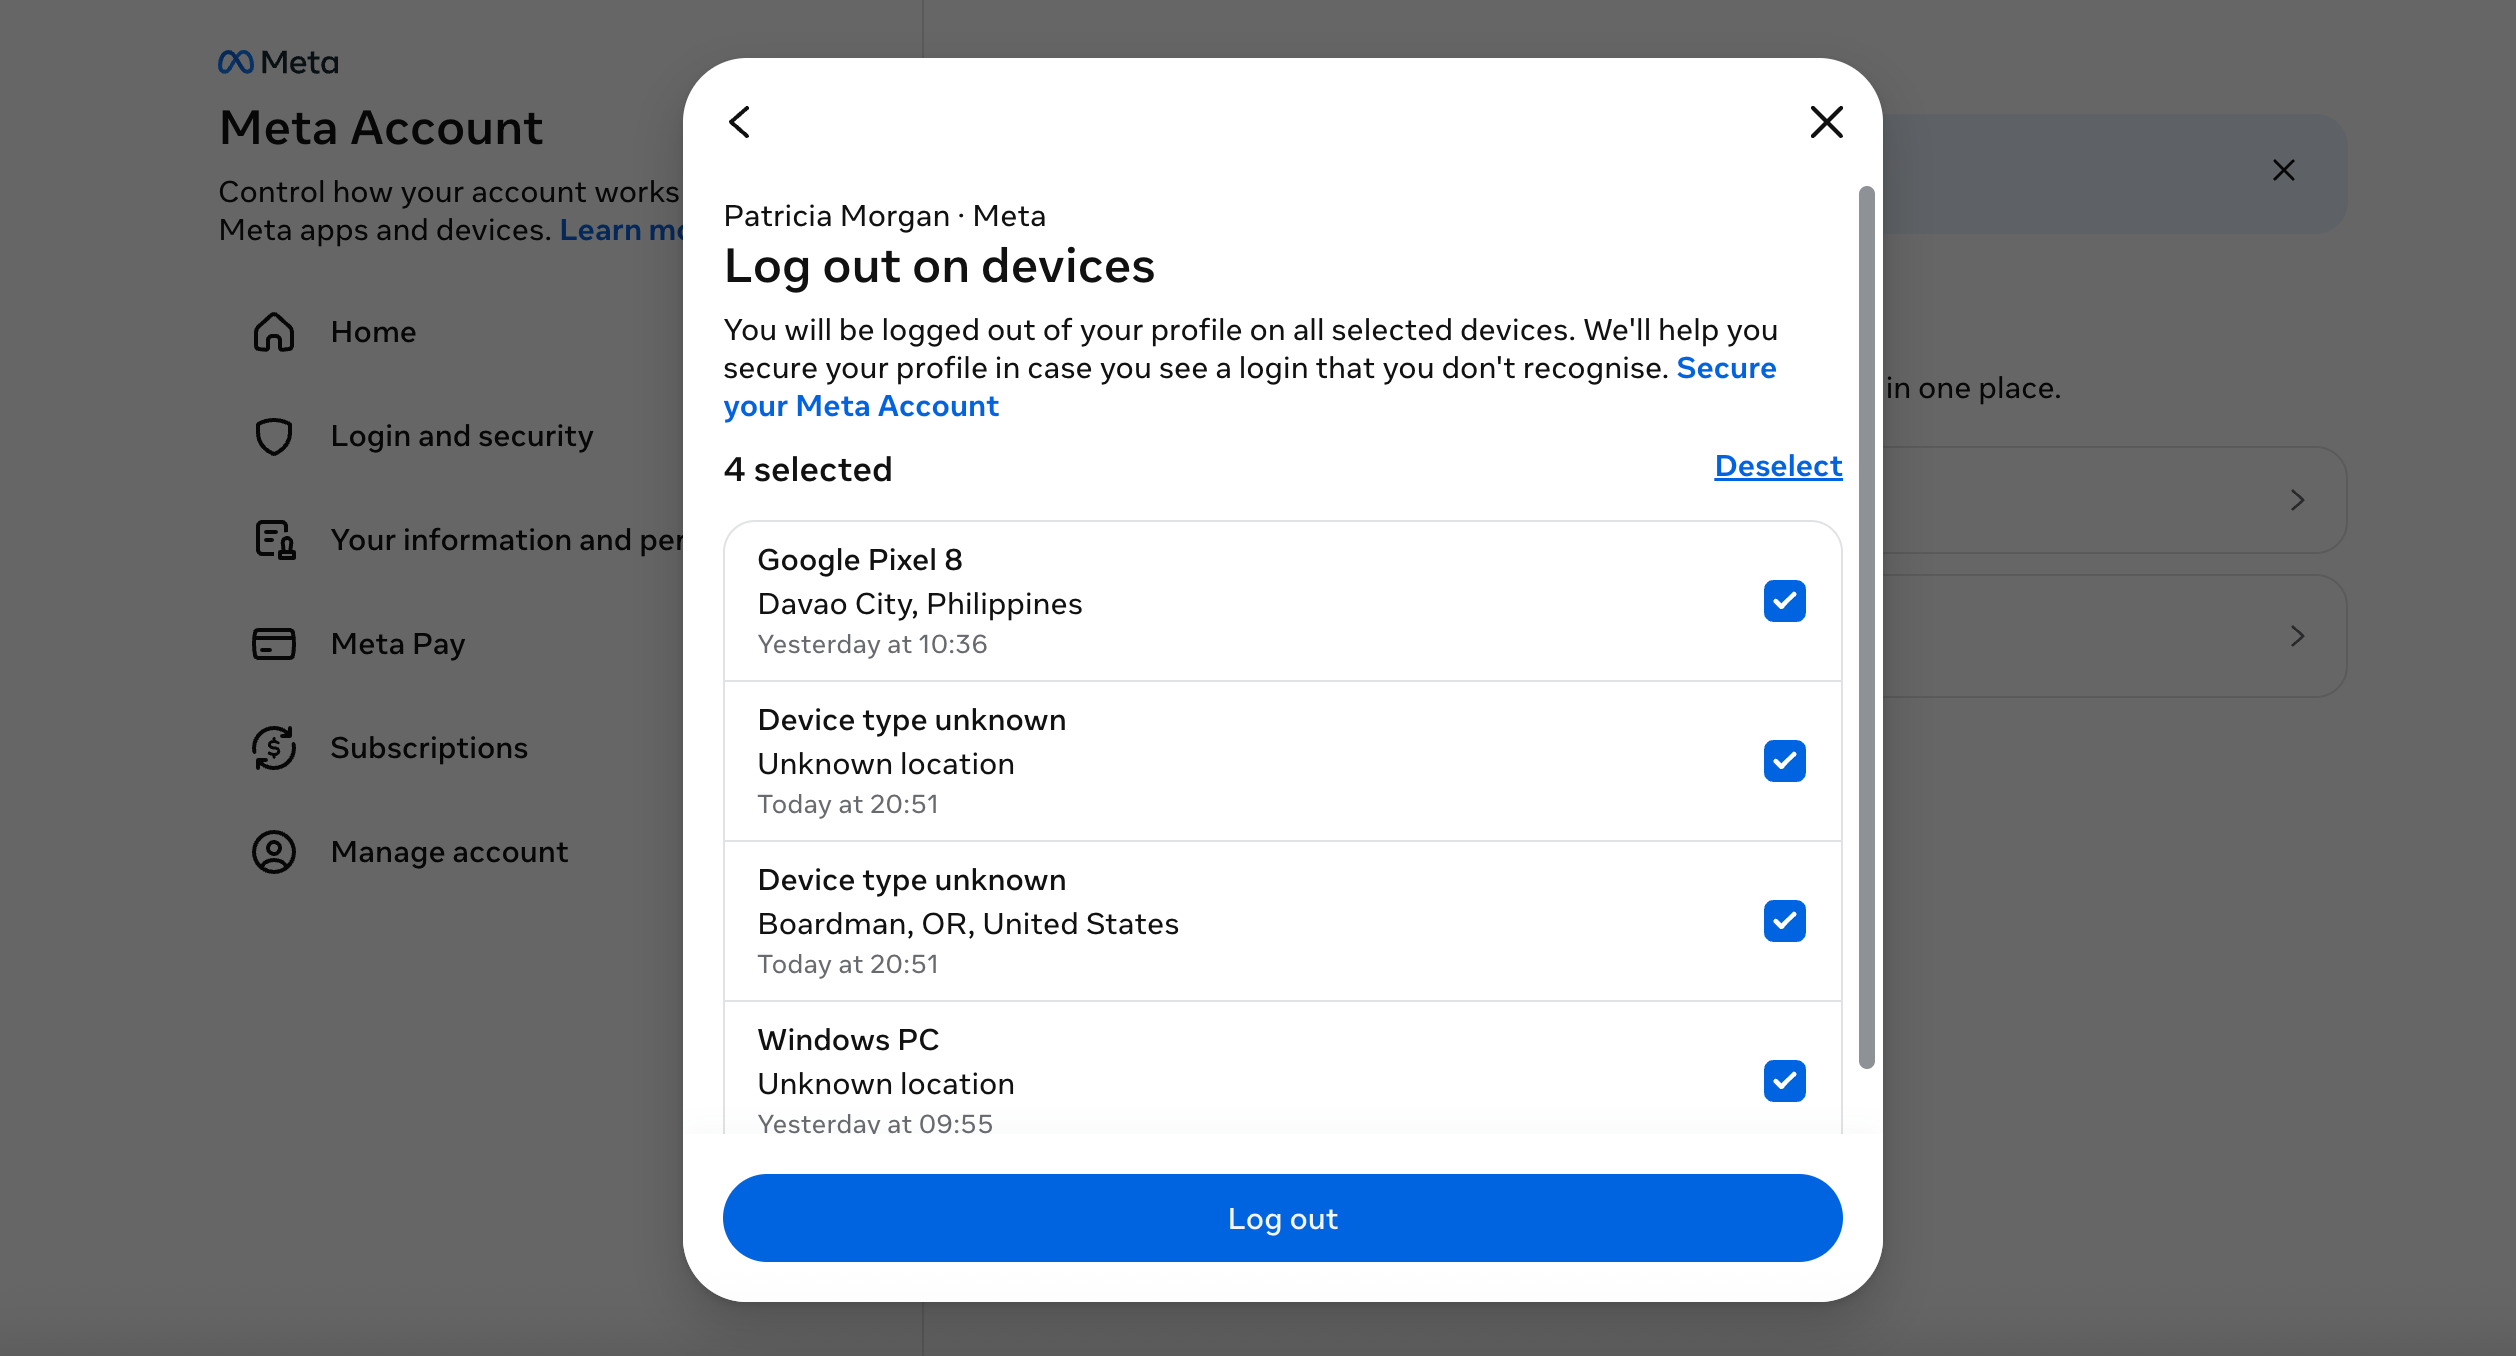
Step 3: Sign out all devices
If you cannot tell which sessions are trustworthy, choose Log out of all devices. Your own computer and phone are signed out too, and you will need the new email, password and 2FA to sign in again.
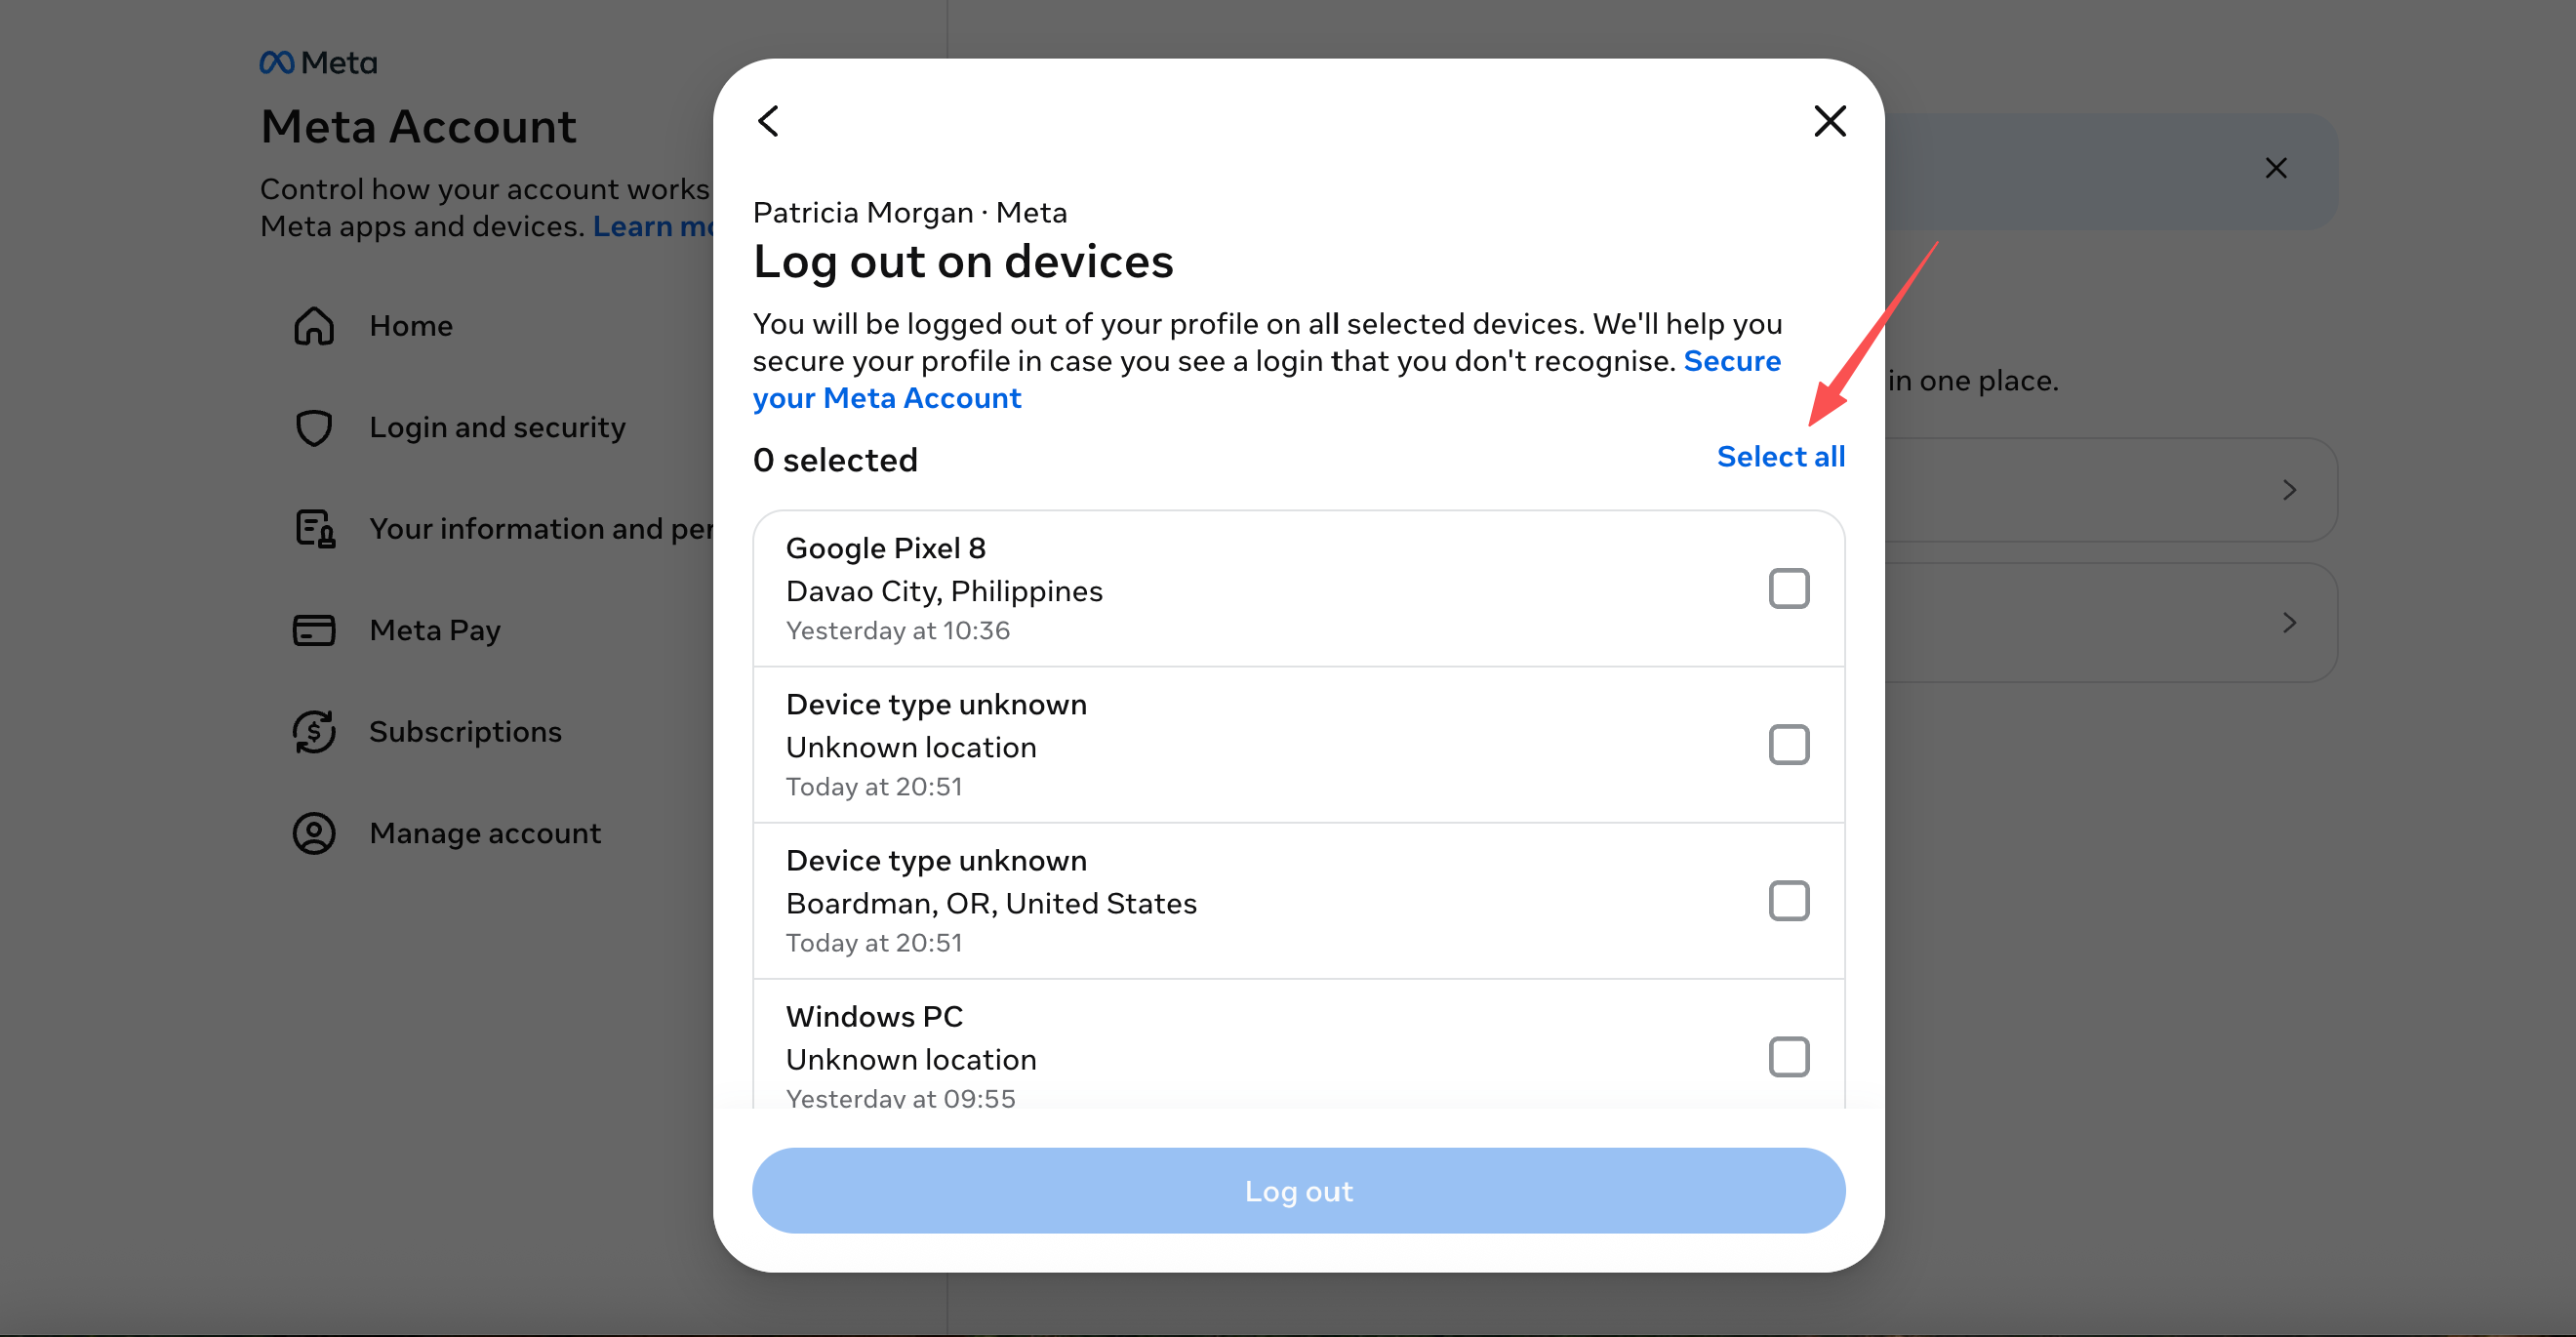
When it finishes, return to the device list and confirm only the device you are using remains.
4. Turn on two-factor authentication (2FA)
2FA asks for a one-time code when signing in on a new device or browser. Meta also recommends this extra layer for sign-ins from unfamiliar devices. See Meta's official account security guidance
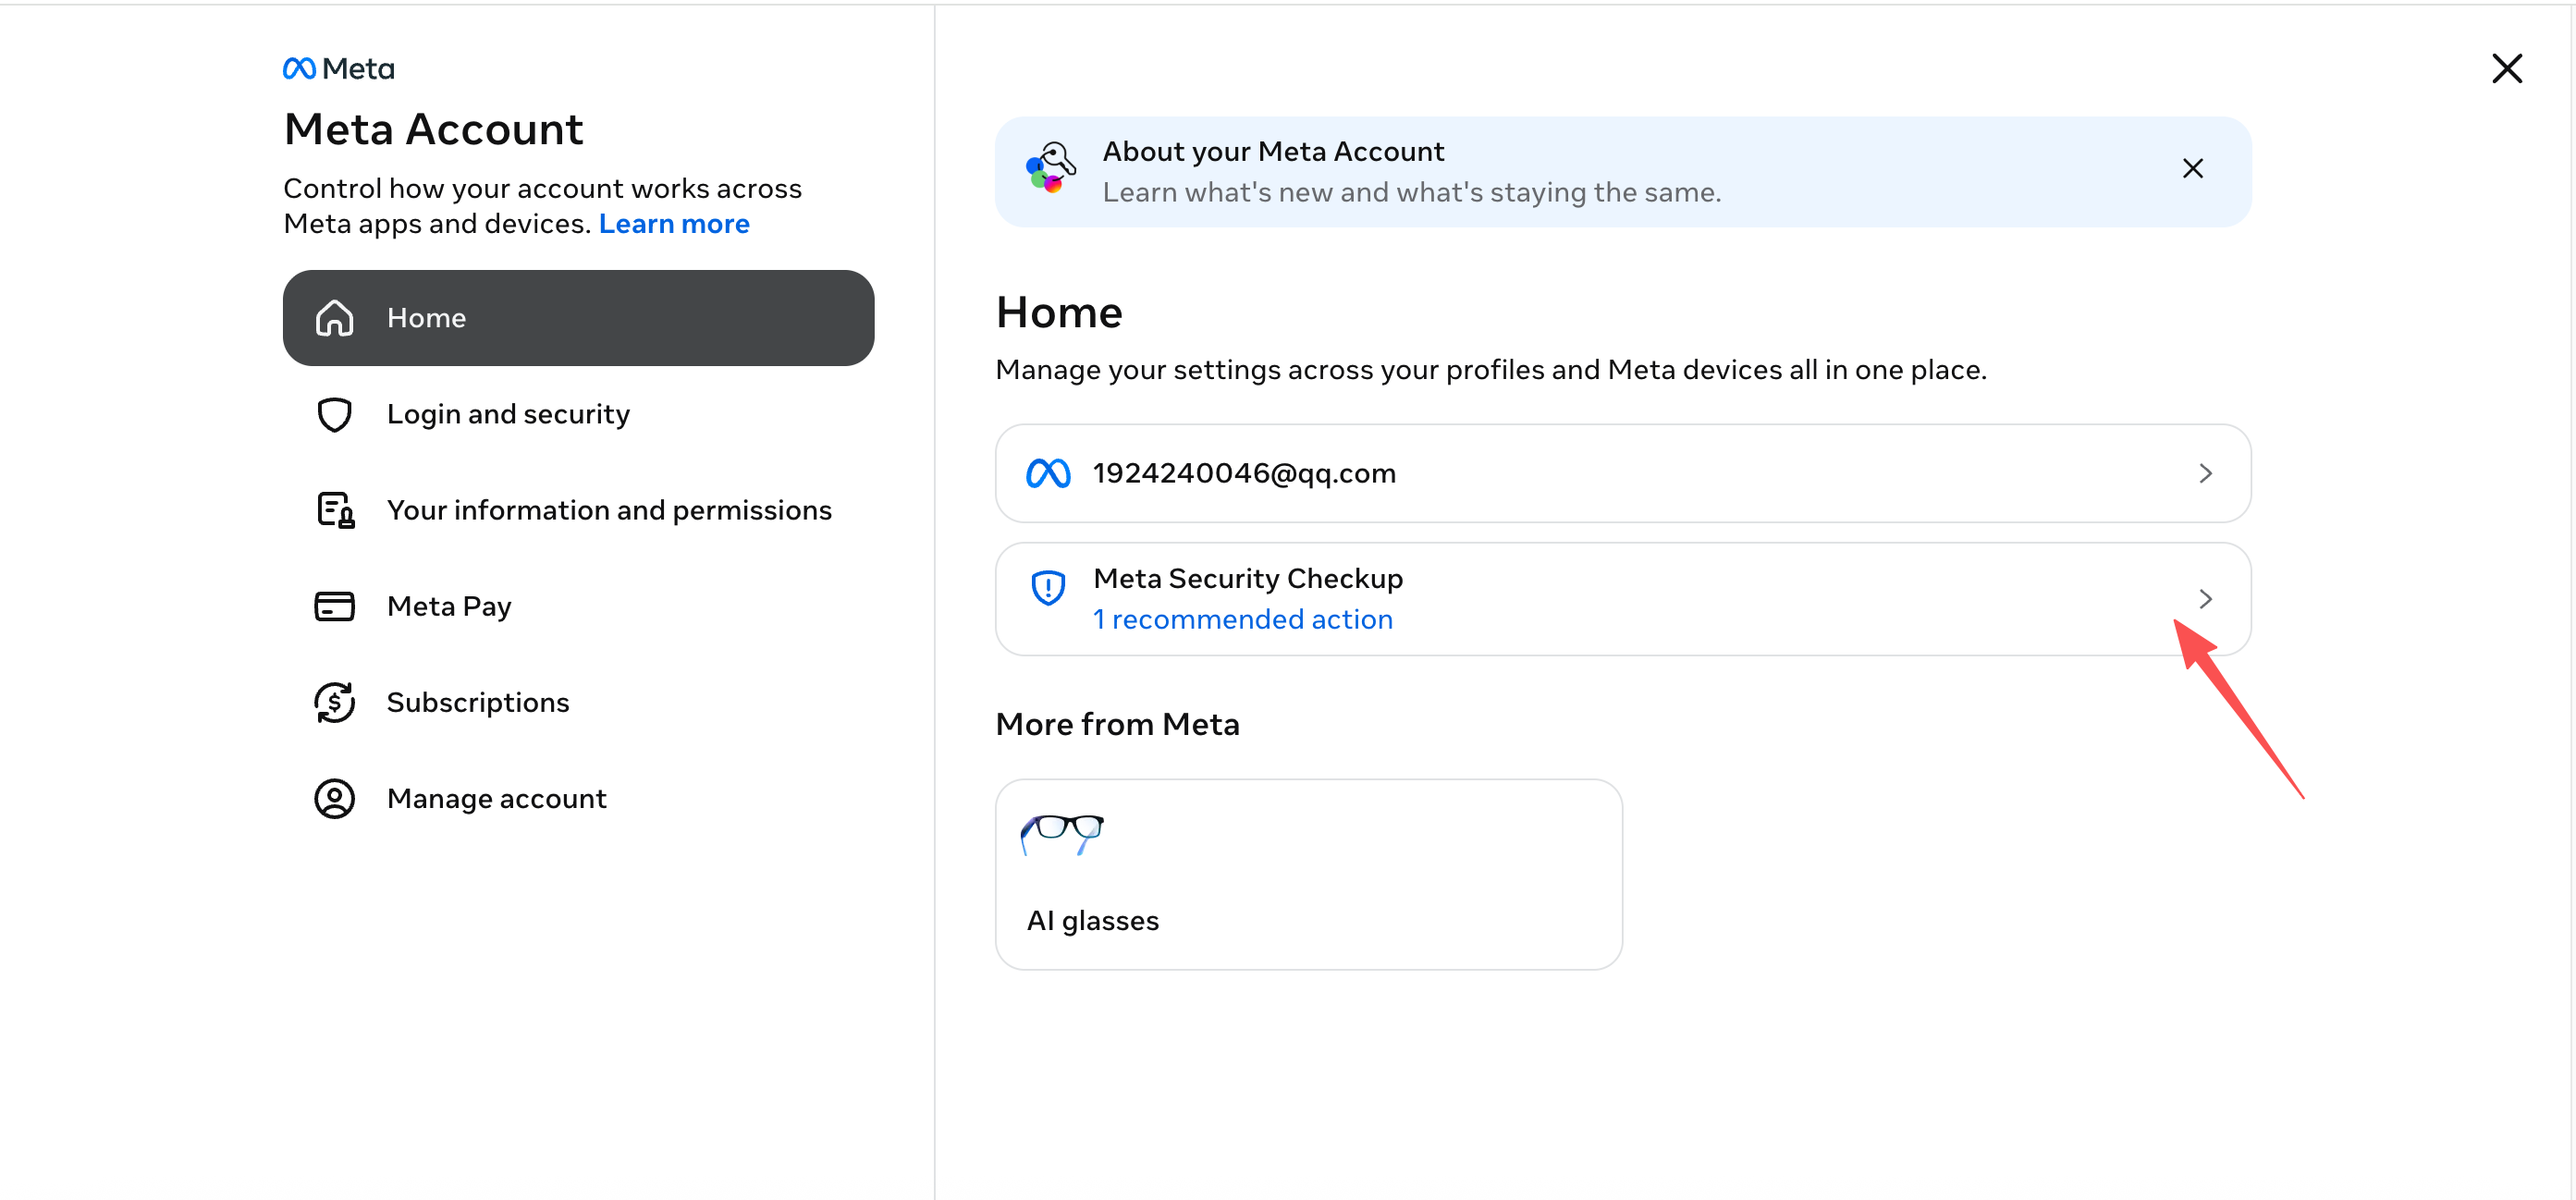
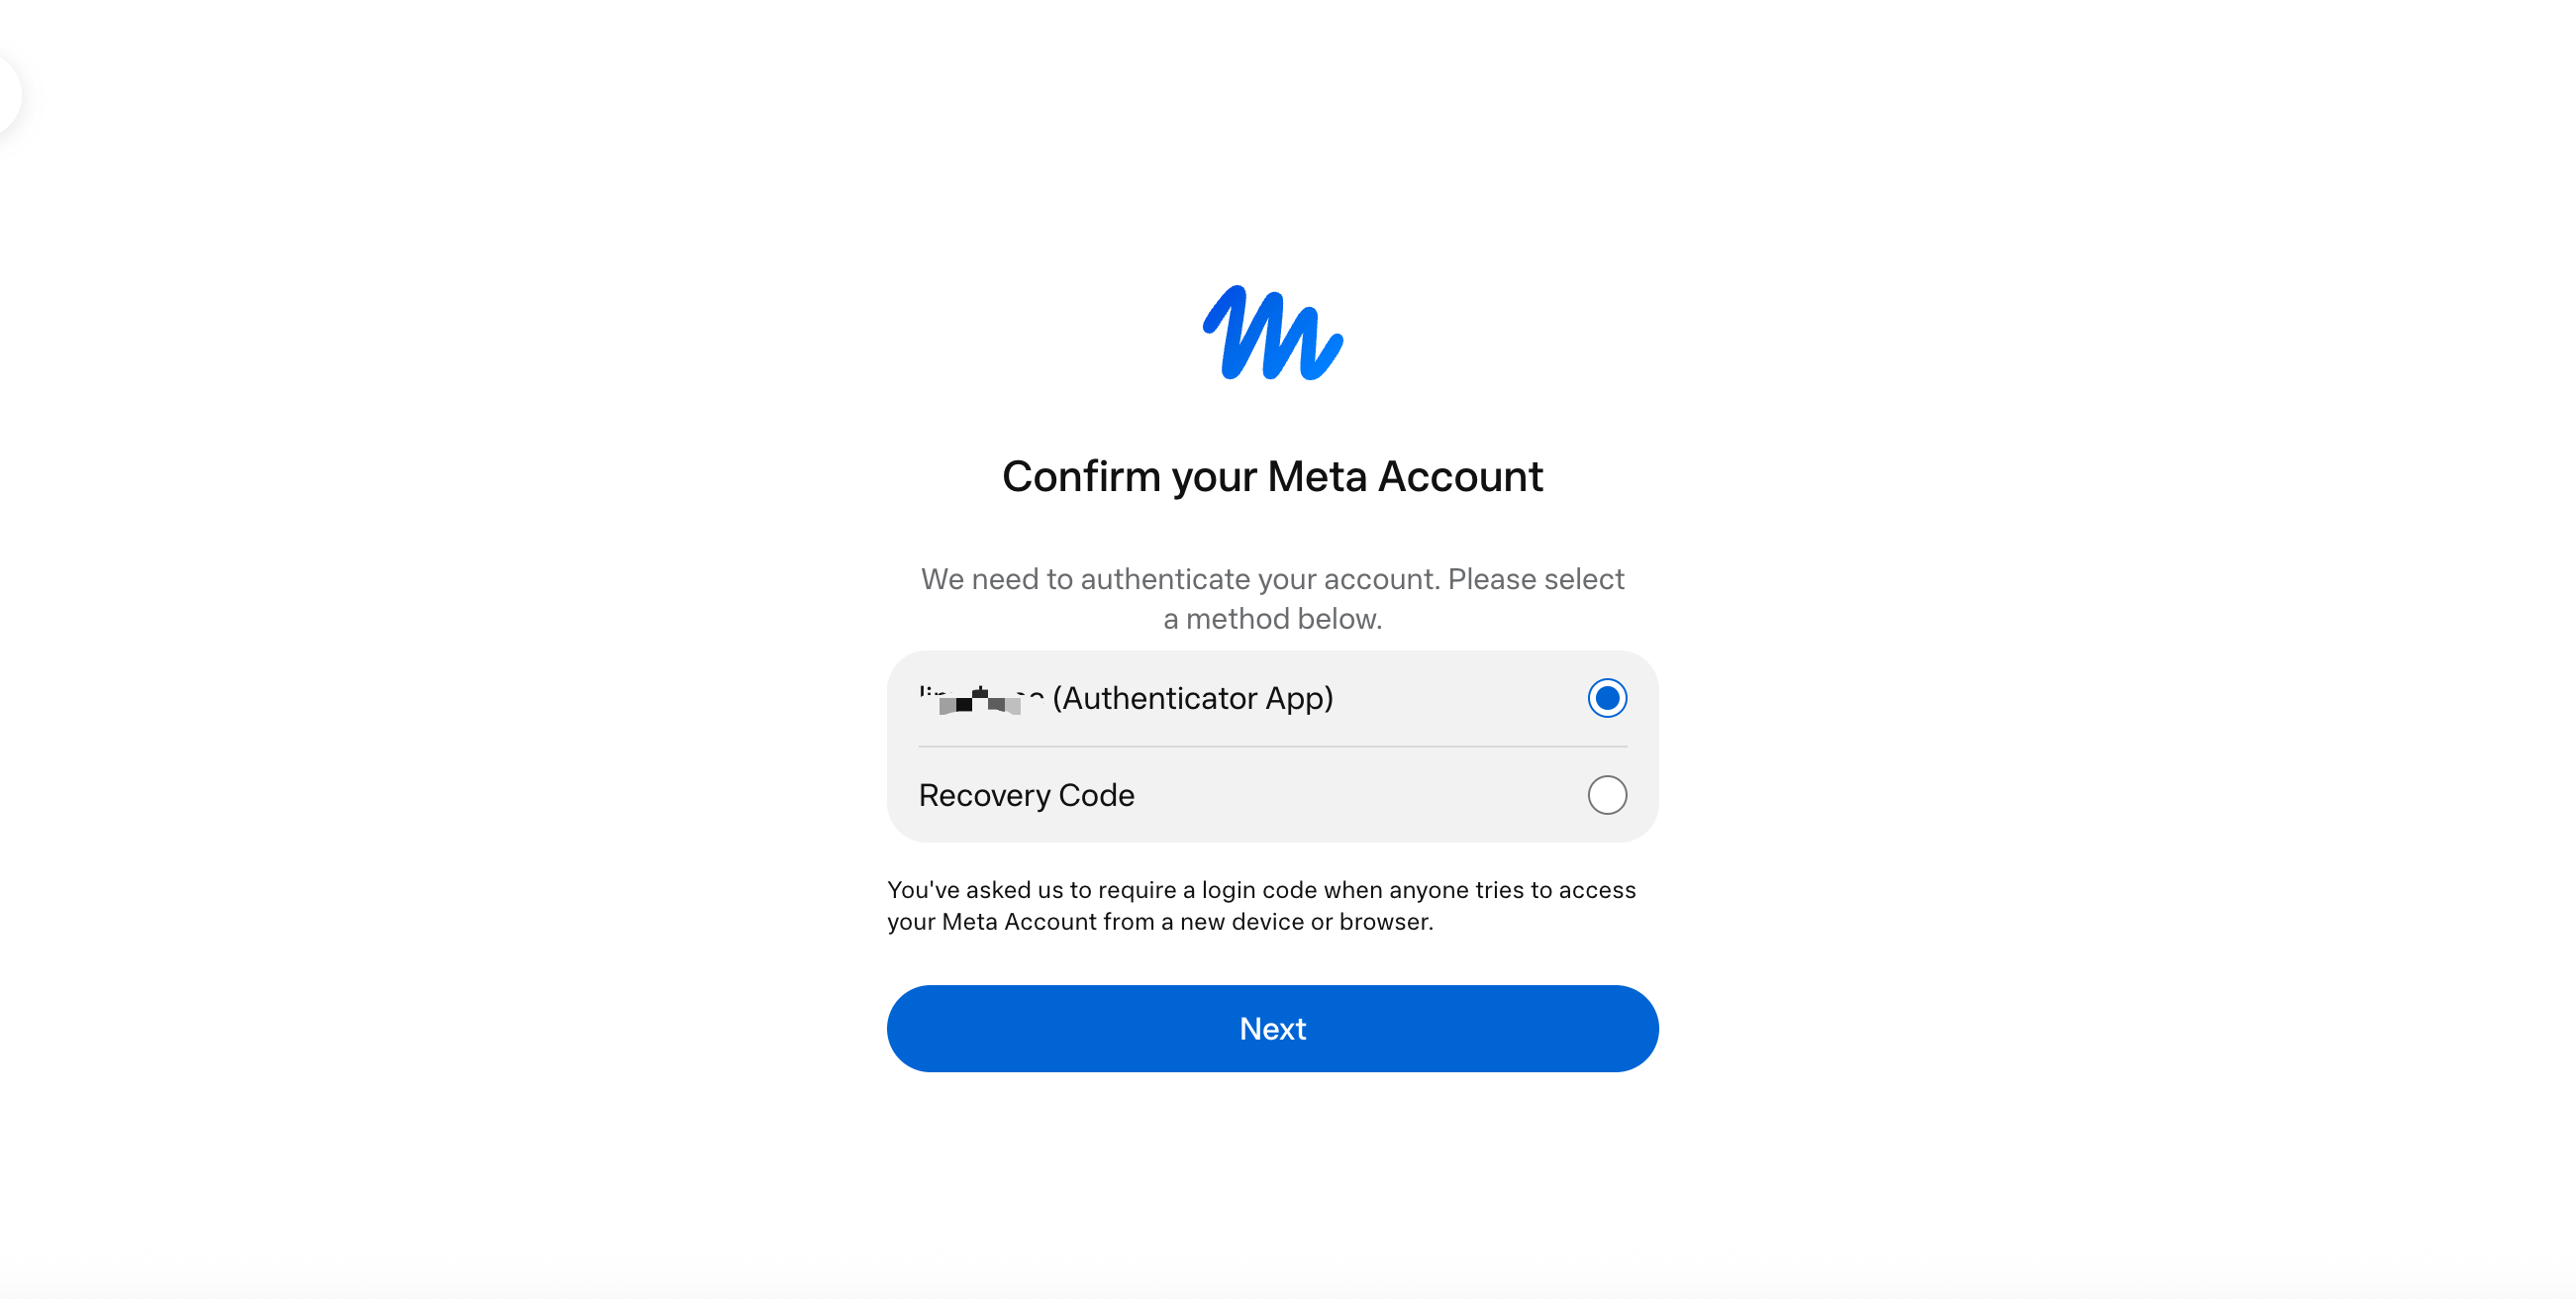
These screenshots include the security check entry and the sign-in verification screen after enabling 2FA, but not the QR-code pairing page. The steps below follow the actual Meta Account setup flow; menu labels may vary by region or version.
Step 1: Open Security Checkup
On the Meta Account home page or in Login and security, open Meta Security Checkup.
Step 2: Add your own authenticator app
In Security Checkup or Login and security, choose Two-factor authentication, then select the Meta Account to protect. Choose Authenticator app, then scan the QR code shown on the page with the authenticator app on your own phone; if a manual key is offered, only enter it into your own authenticator app.
The authenticator generates a 6-digit code. Enter the current code back into Meta Account to finish pairing, then download or write down the recovery codes immediately and store them in a password manager or another safe place.
Do not enter the QR code, manual key, one-time codes or recovery codes into third-party online tools. They can be used to generate sign-in codes.
Step 3: Confirm sign-in works after enabling it
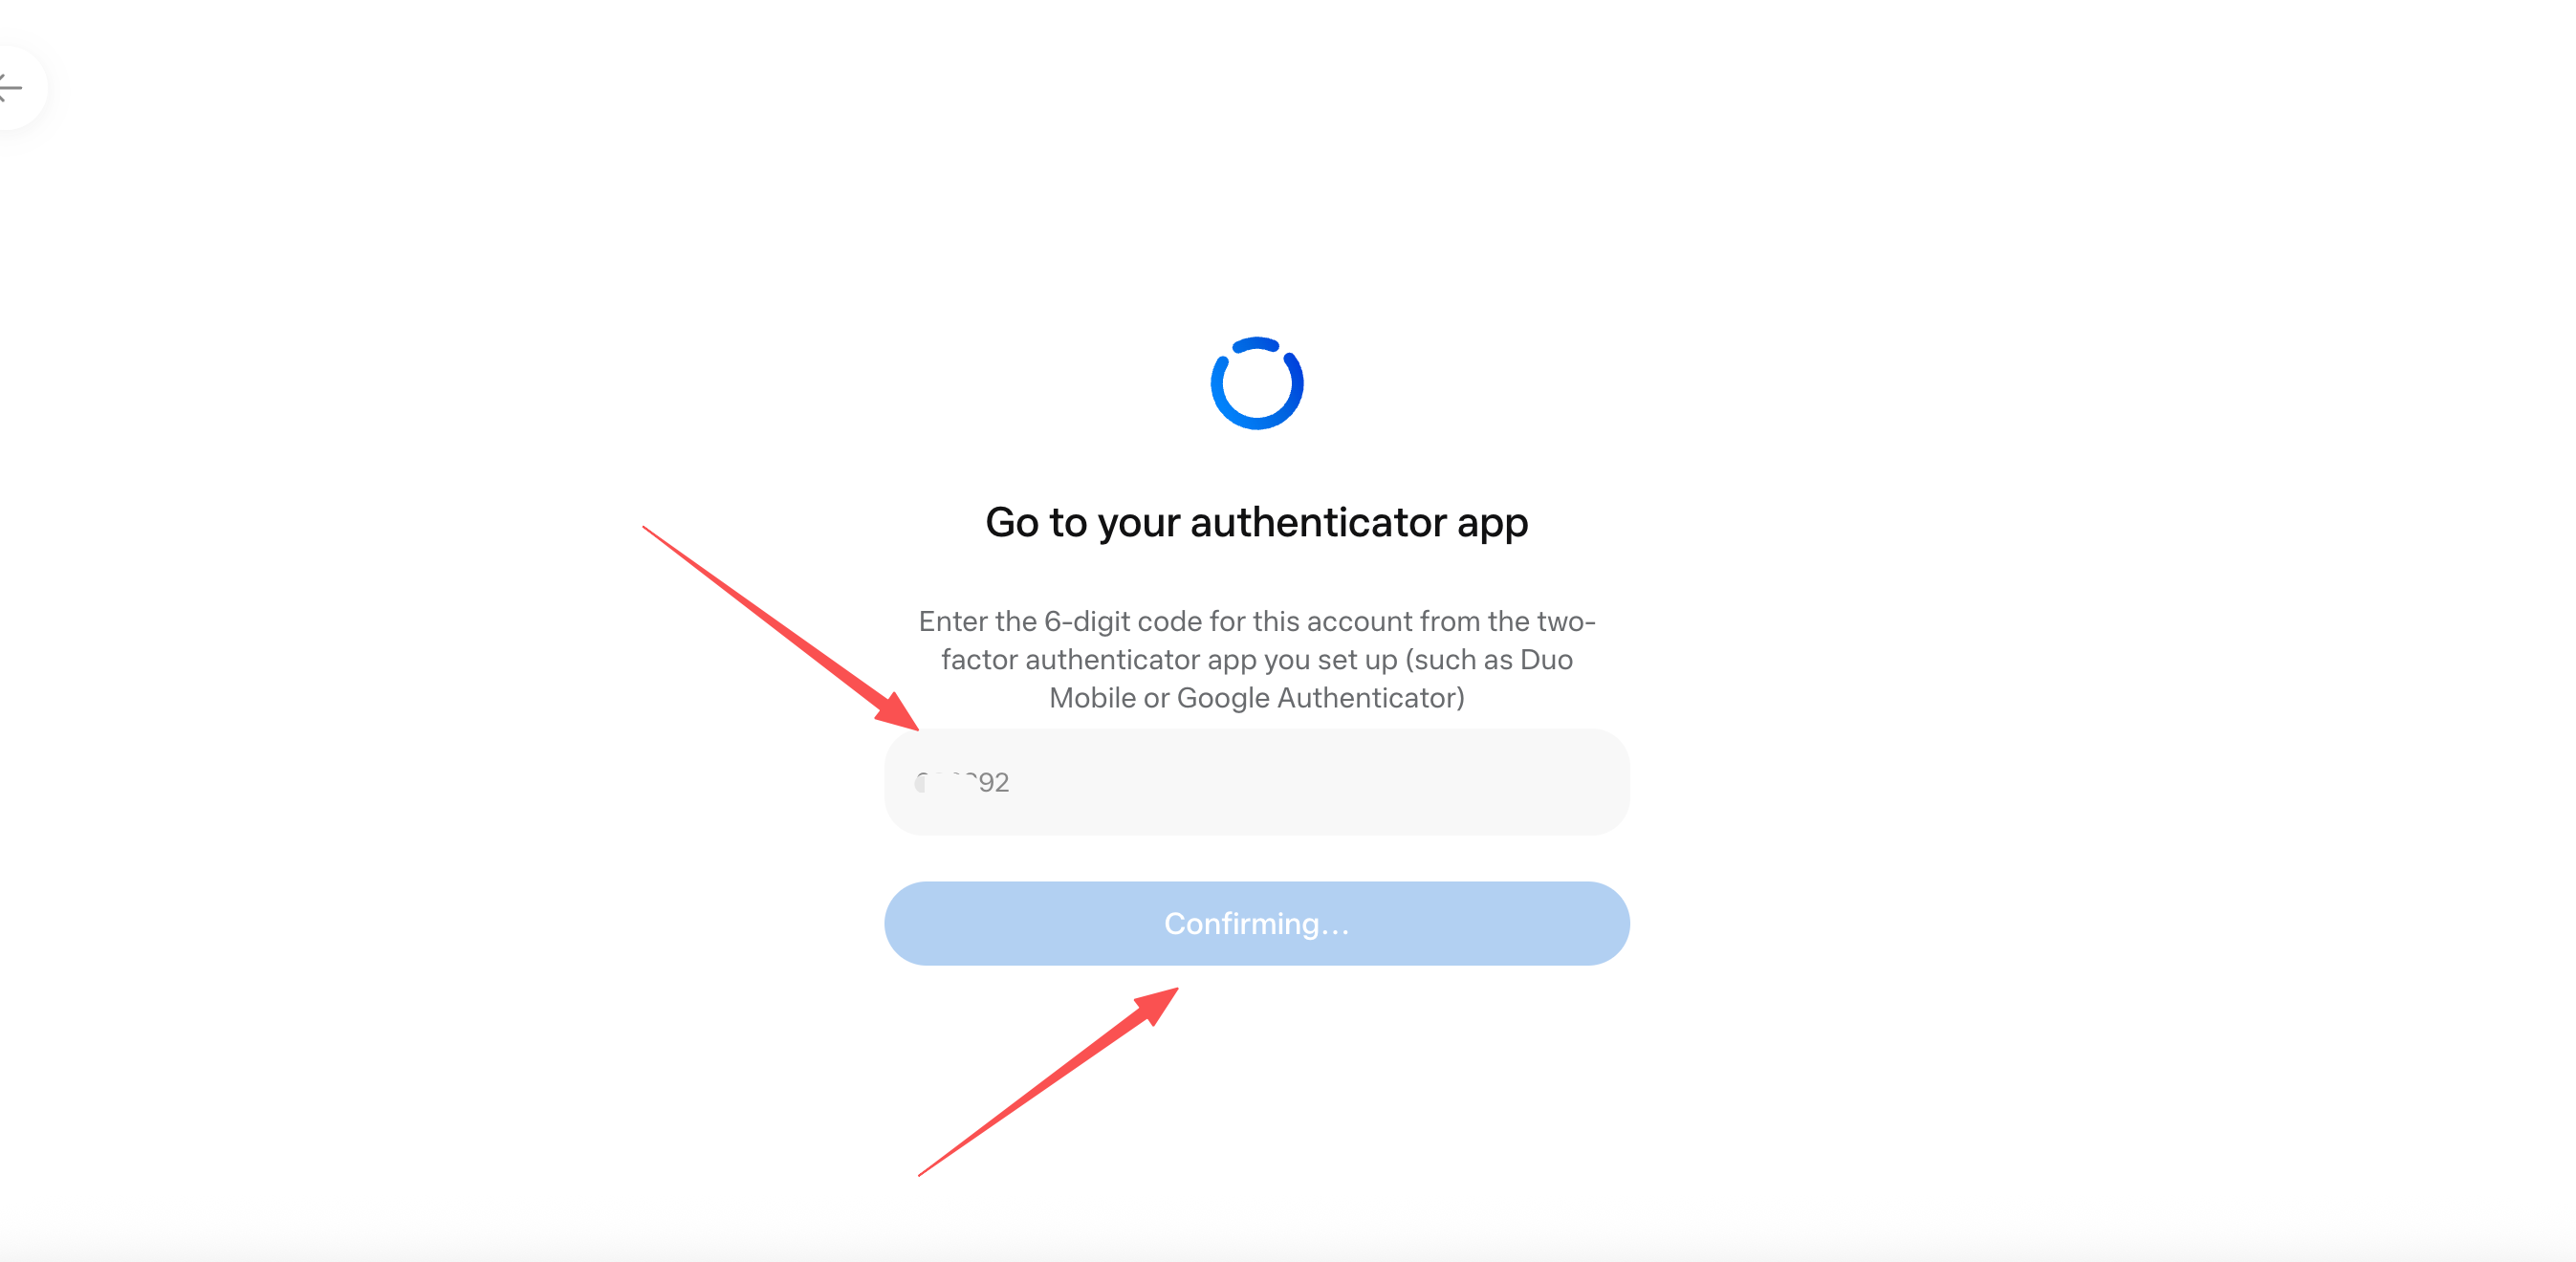
Once set up, signing in on a new device or browser requires the extra verification. The screenshot below is the screen for choosing the authenticator app or a recovery code with 2FA enabled.
Afterwards, when you open Muse on a new device, enter the account sign-in details first.
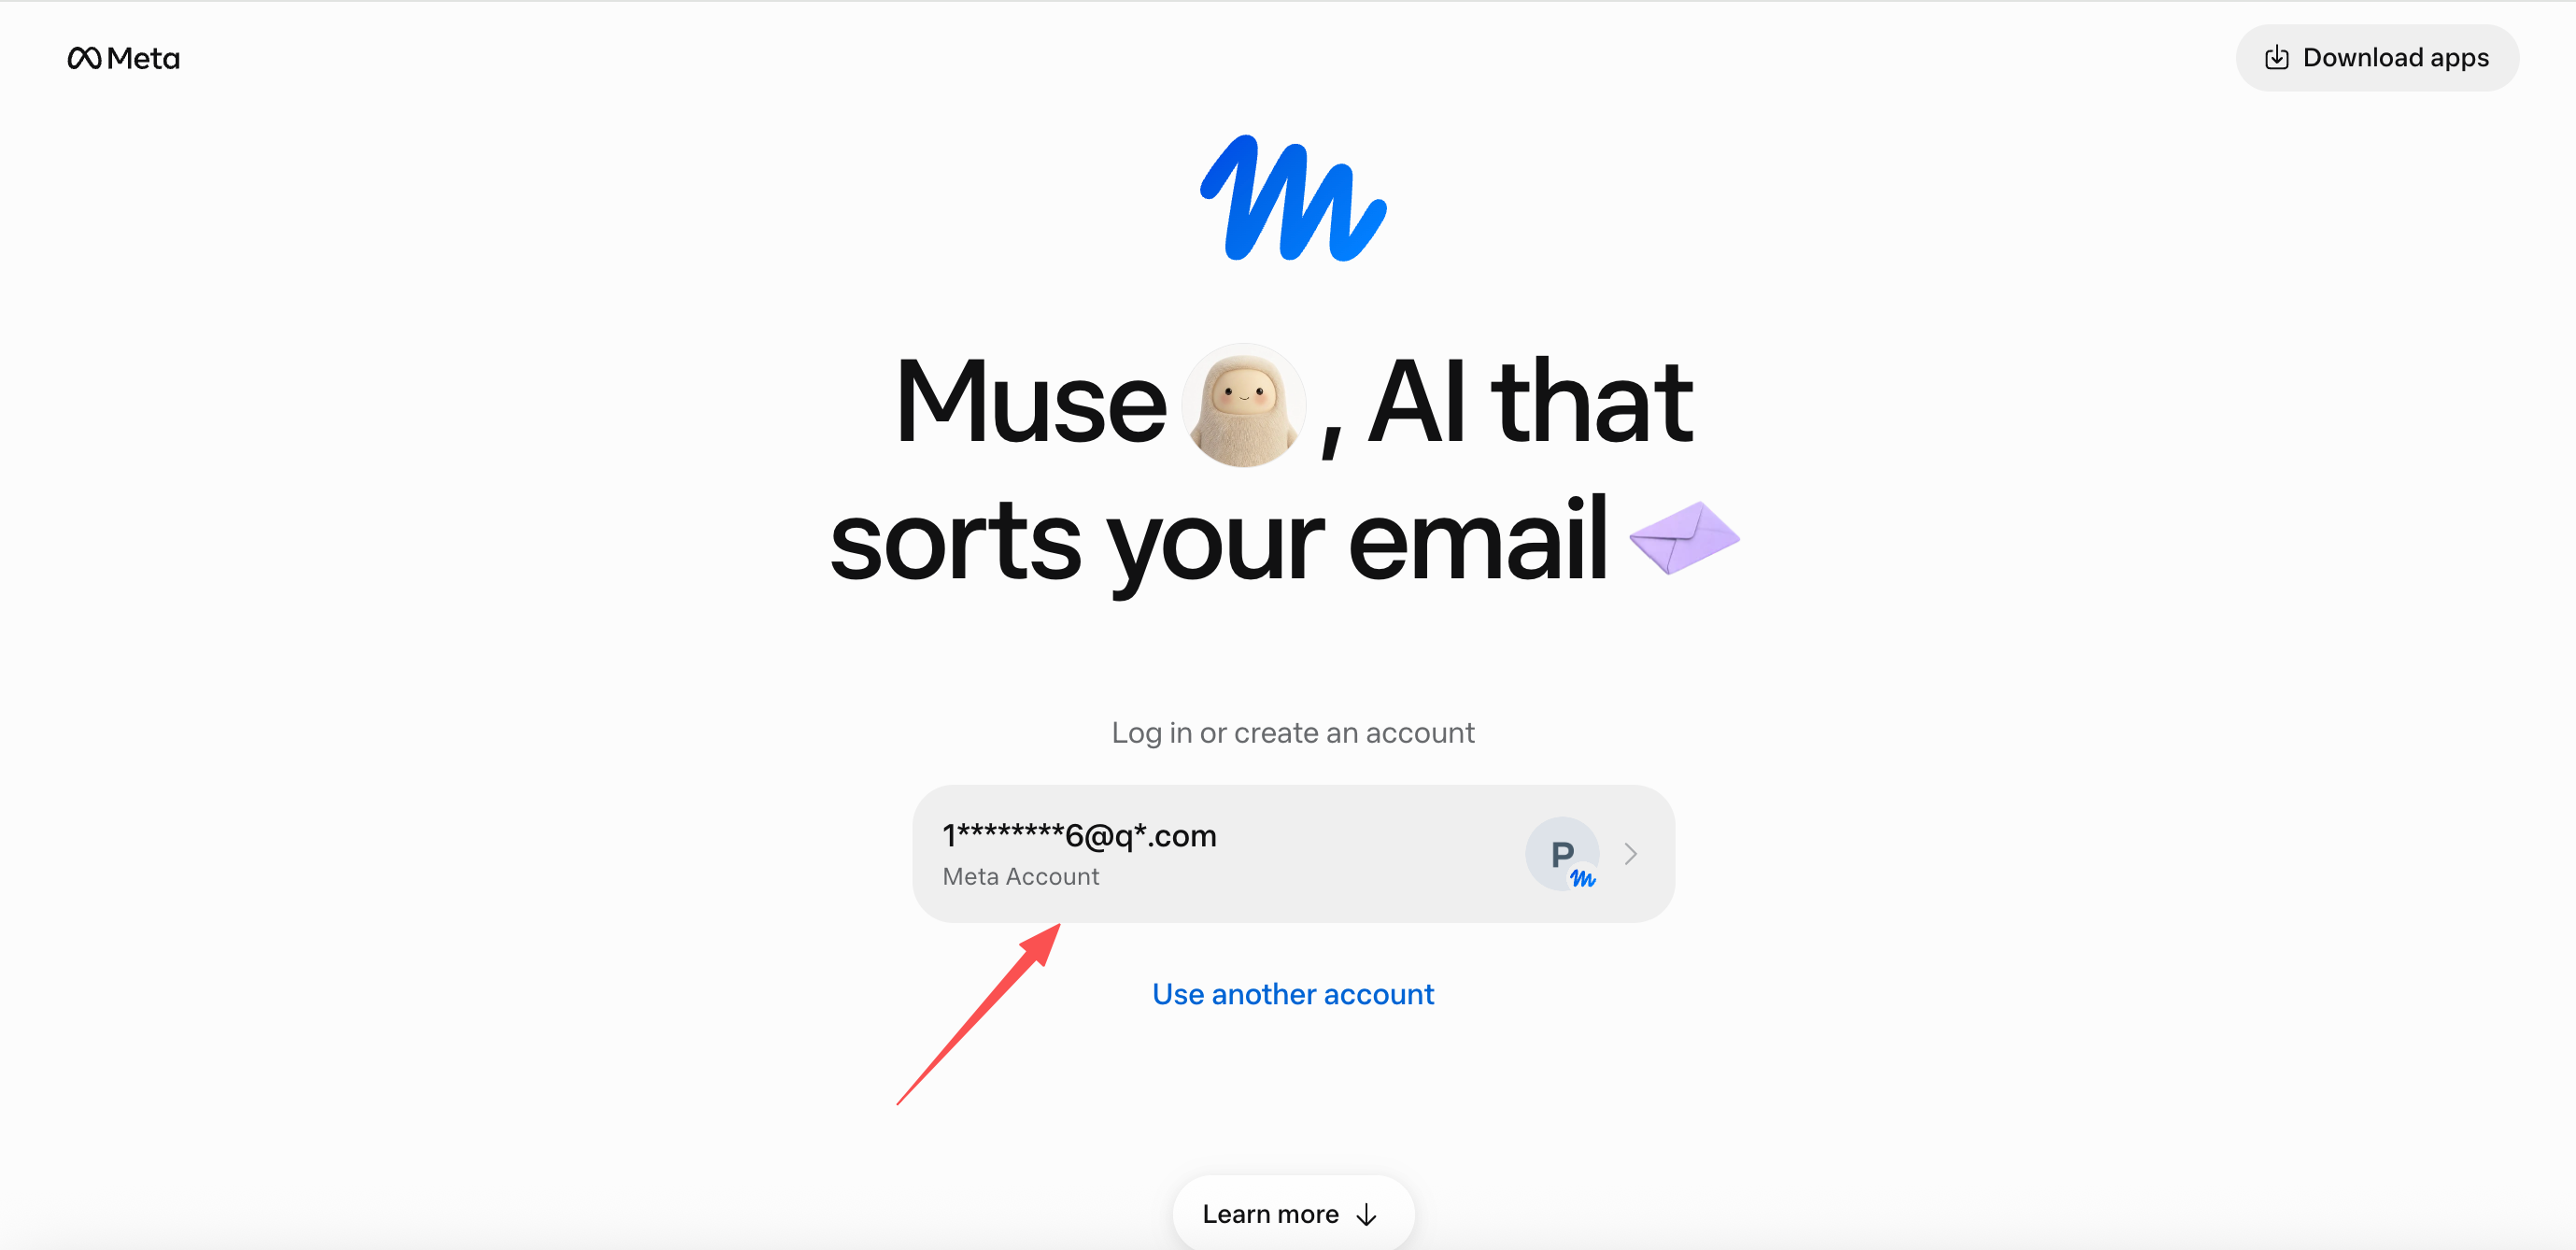
If email verification is required, enter the code sent to your inbox as prompted.
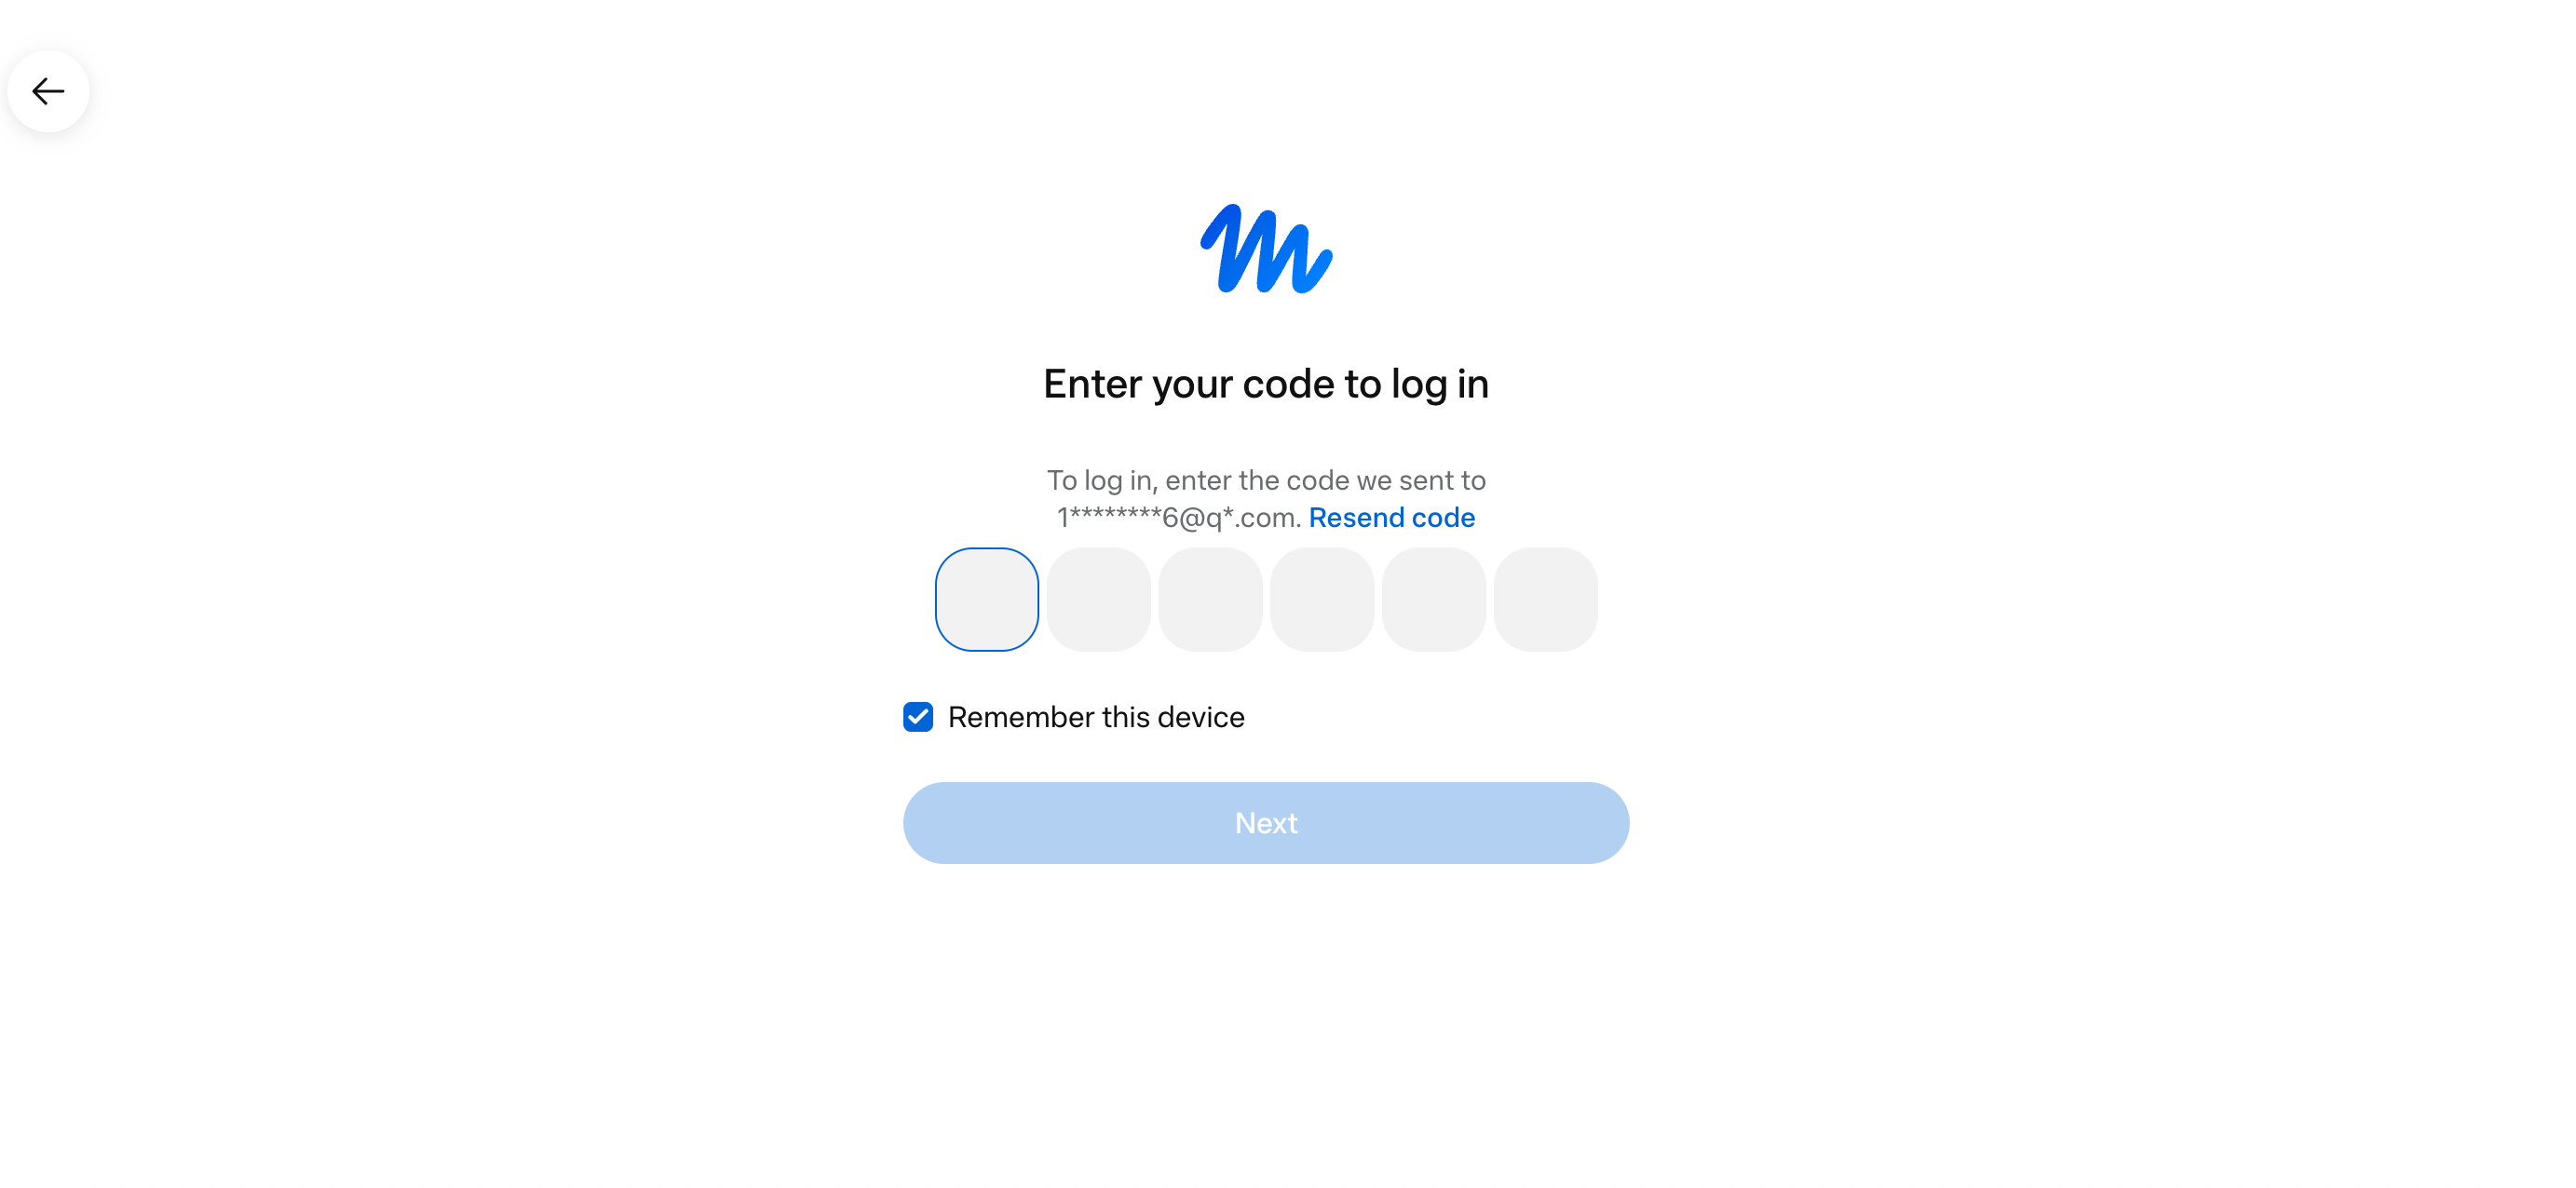
Then open your authenticator app, enter the current 6-digit code, and finish signing in.
5. Check these 4 items when you're done
- The new email is verified and can receive sign-in or security notifications.
- The old email is removed, or at least no longer the only recovery method.
- The device list has no unfamiliar devices; sign out of all devices if needed.
- 2FA is on, the recovery codes are stored separately, and no authenticator key has leaked.